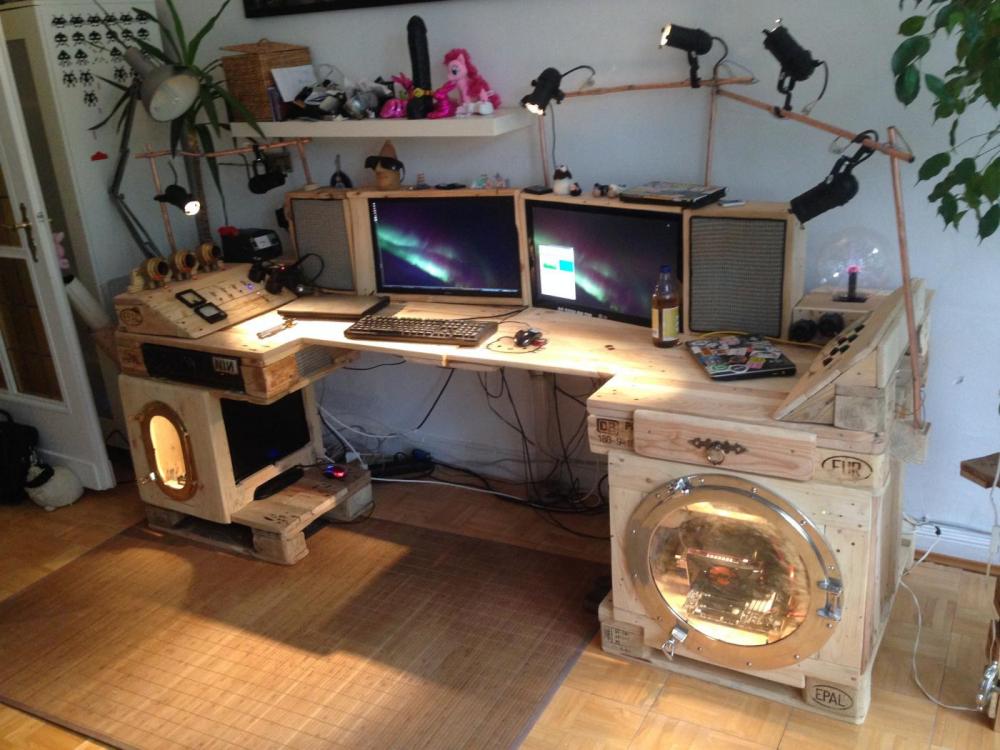

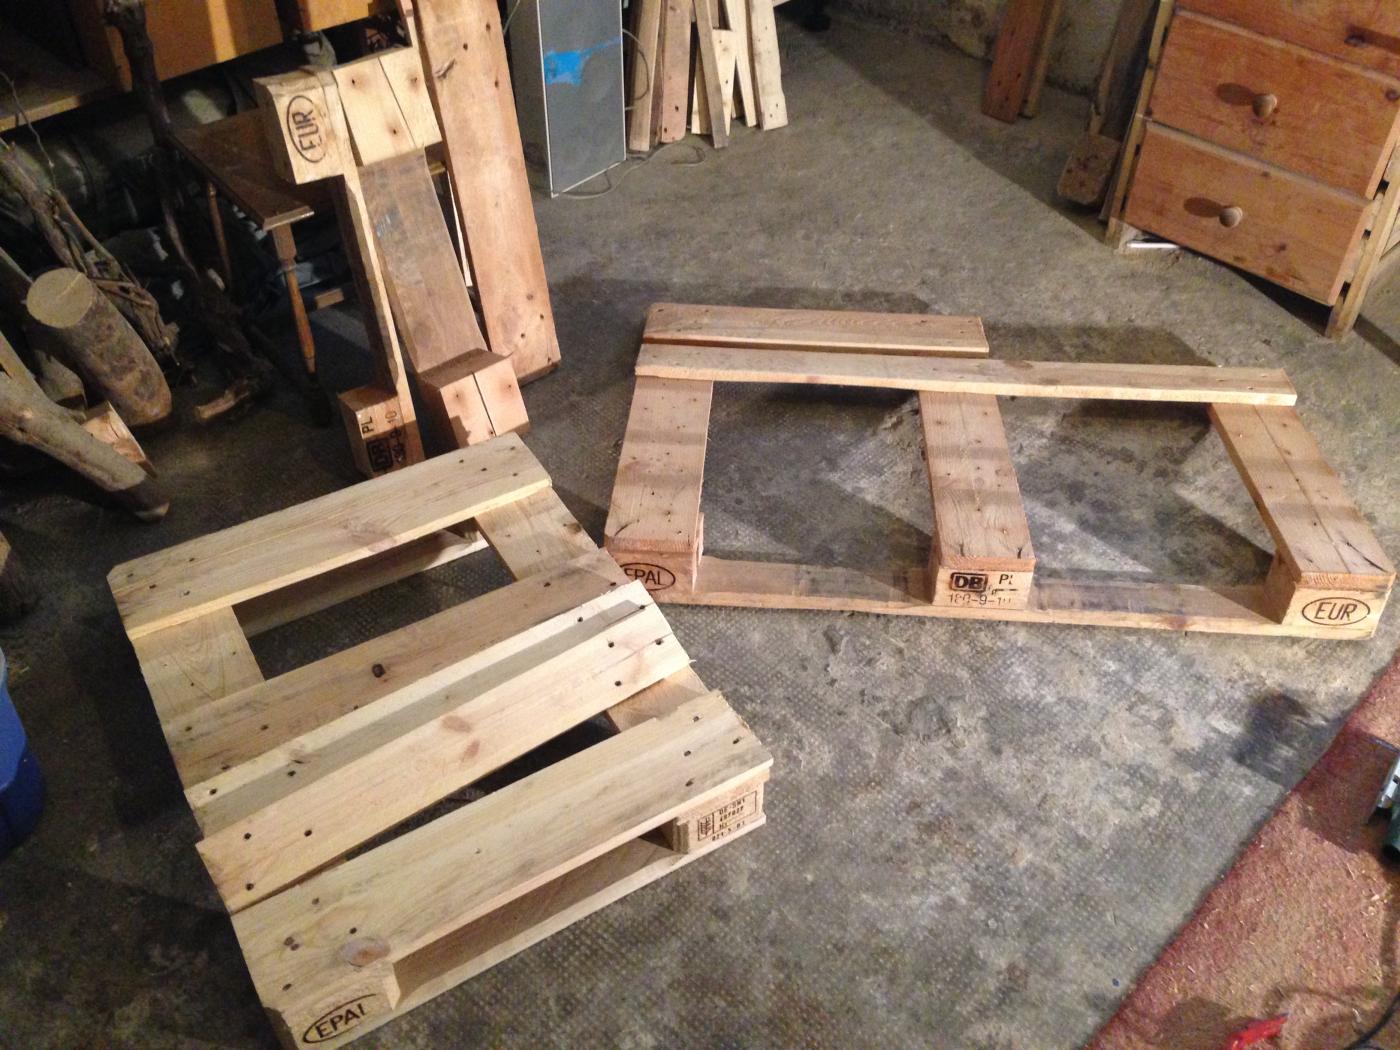
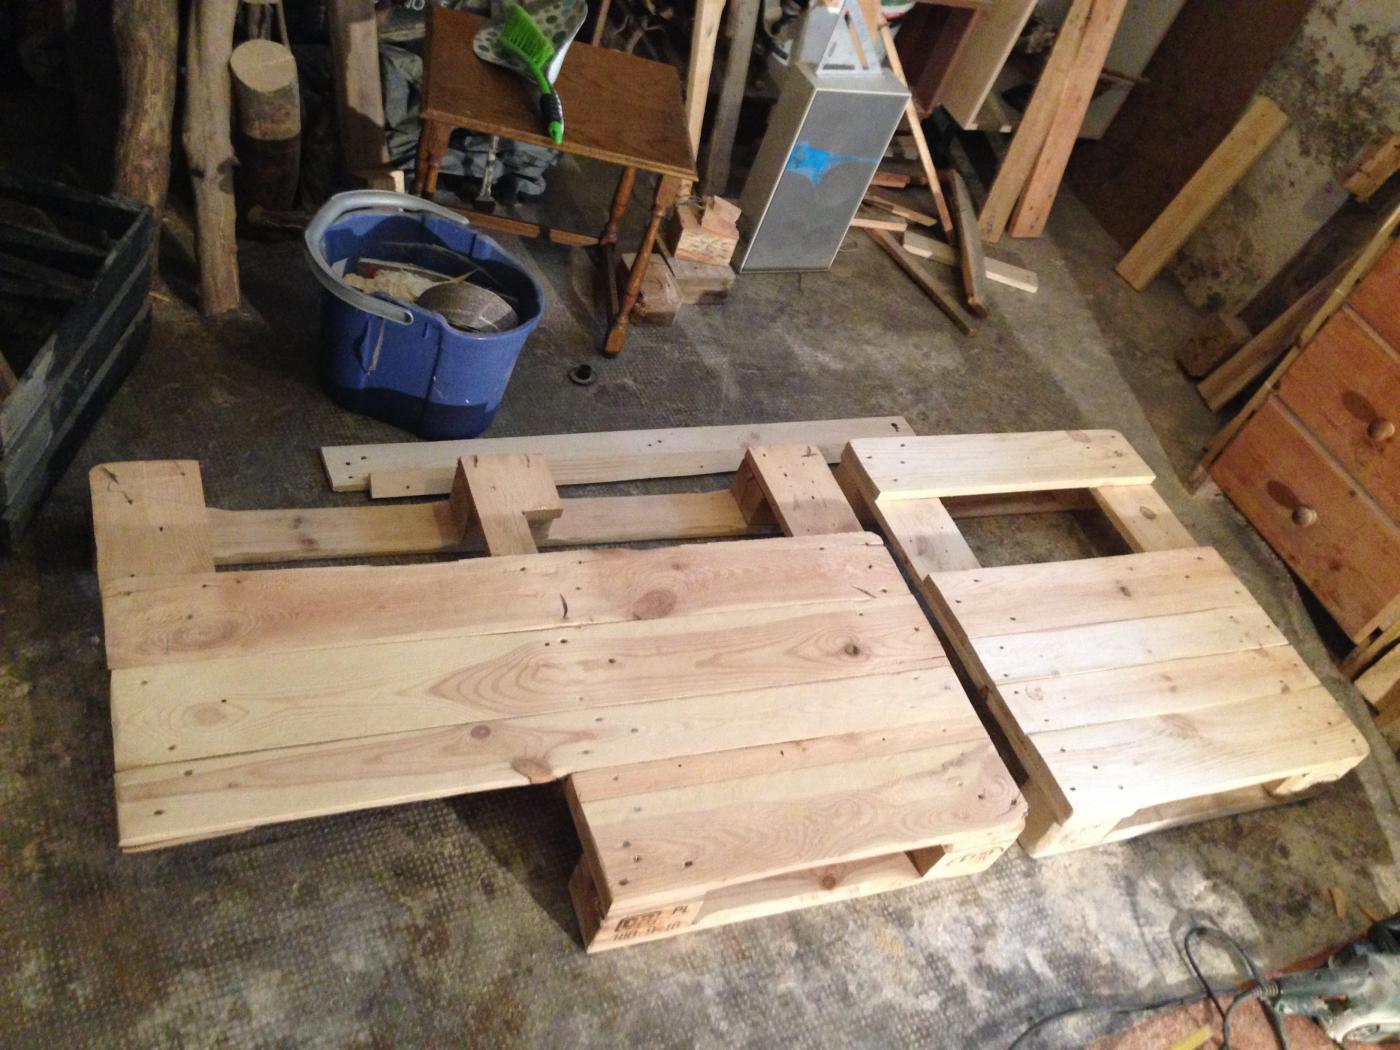
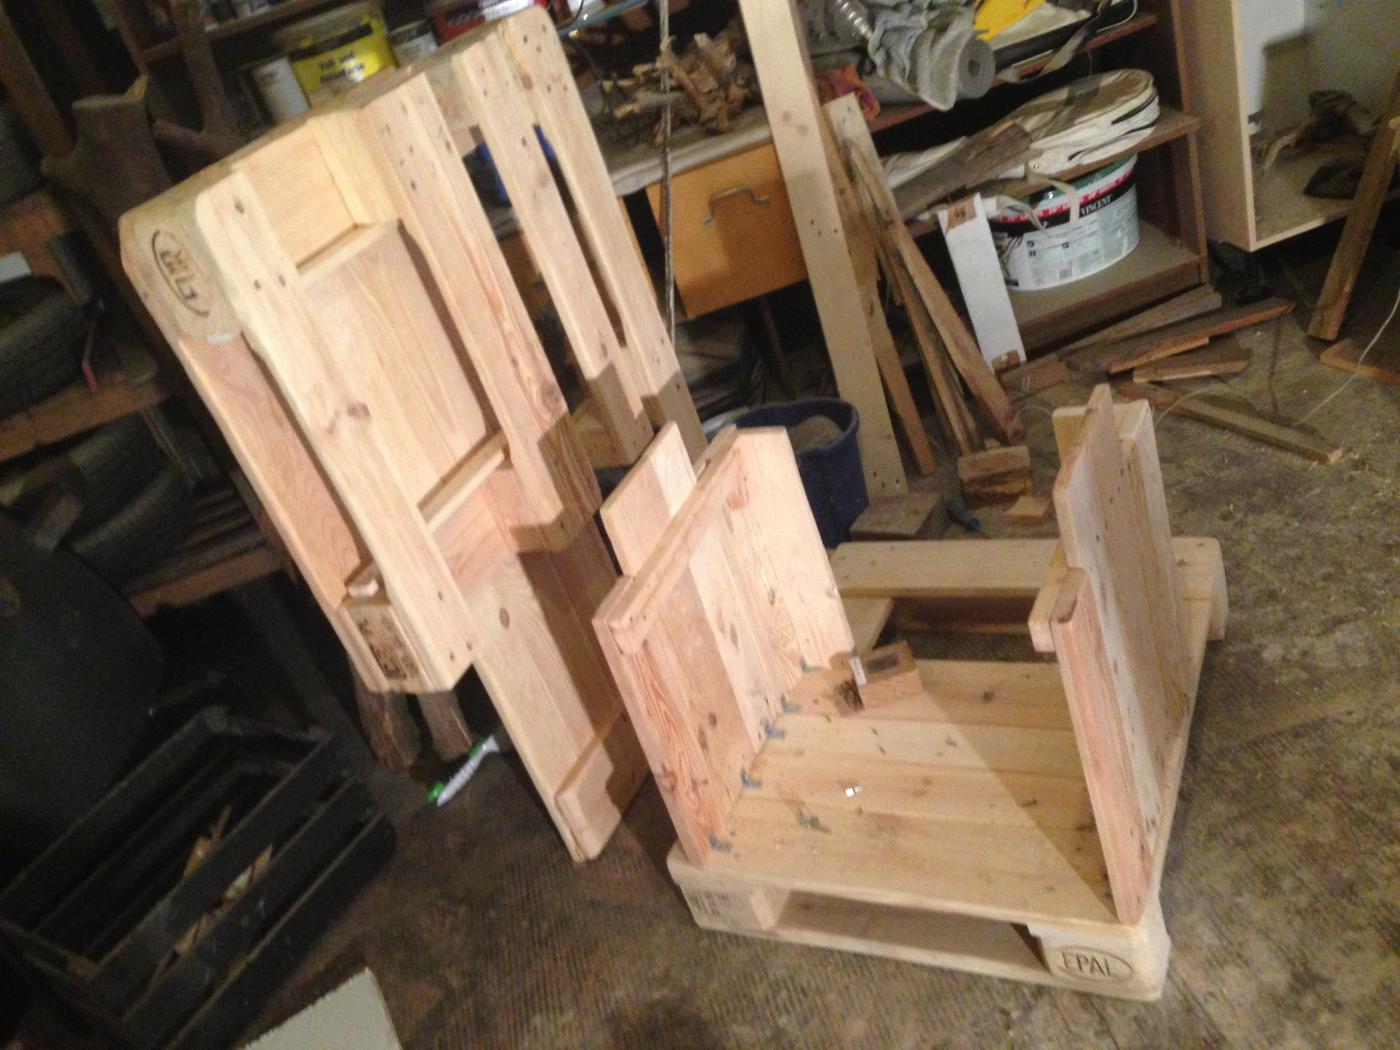
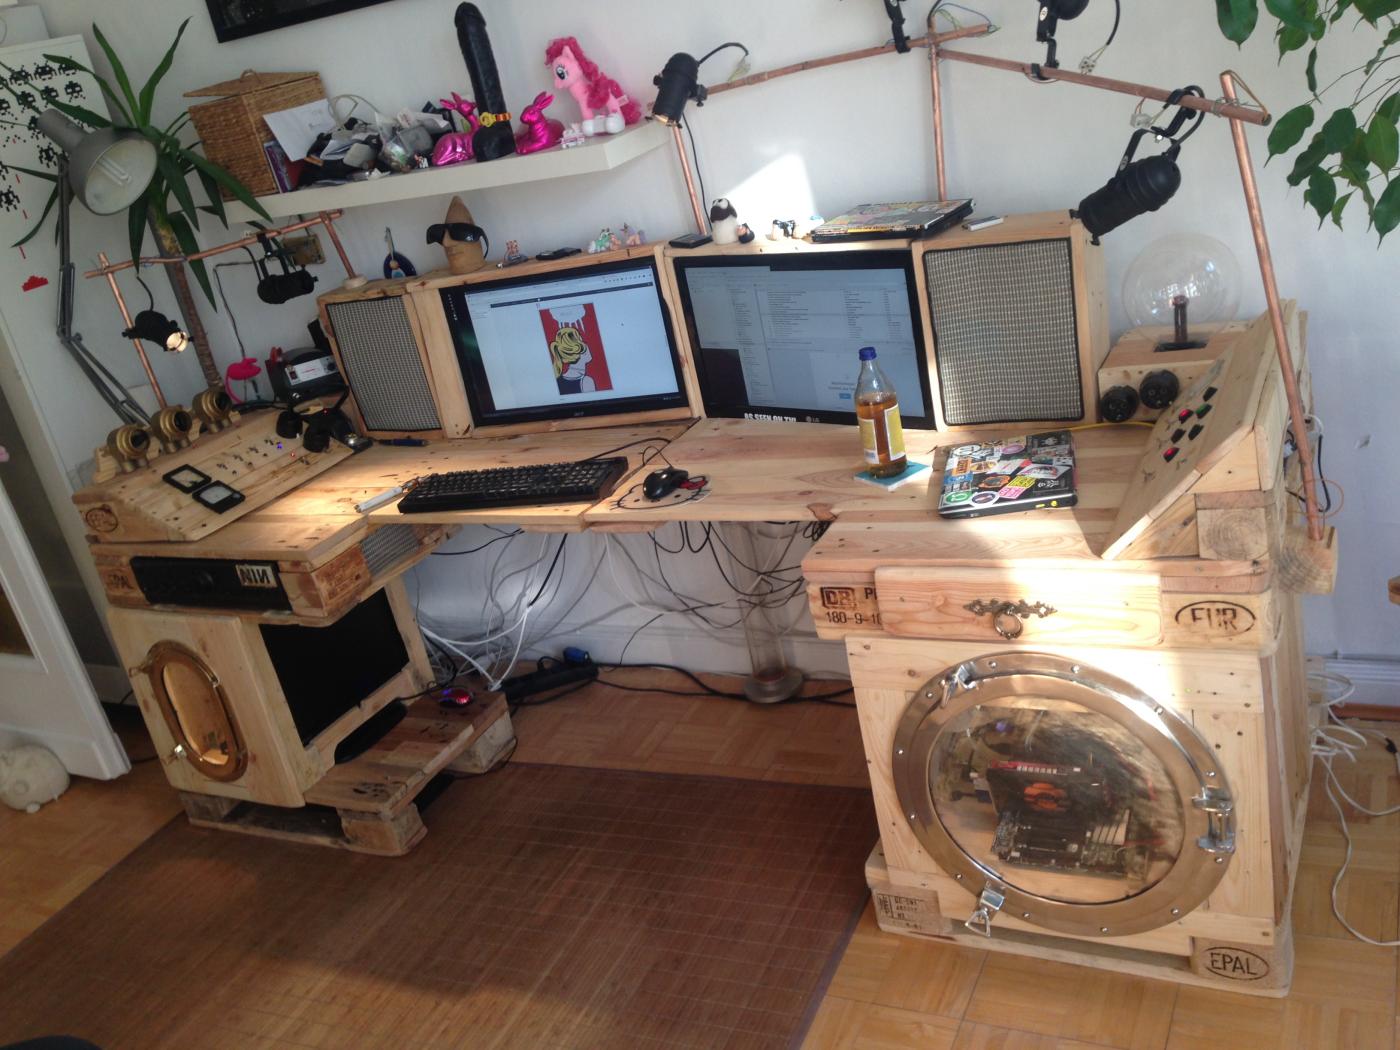
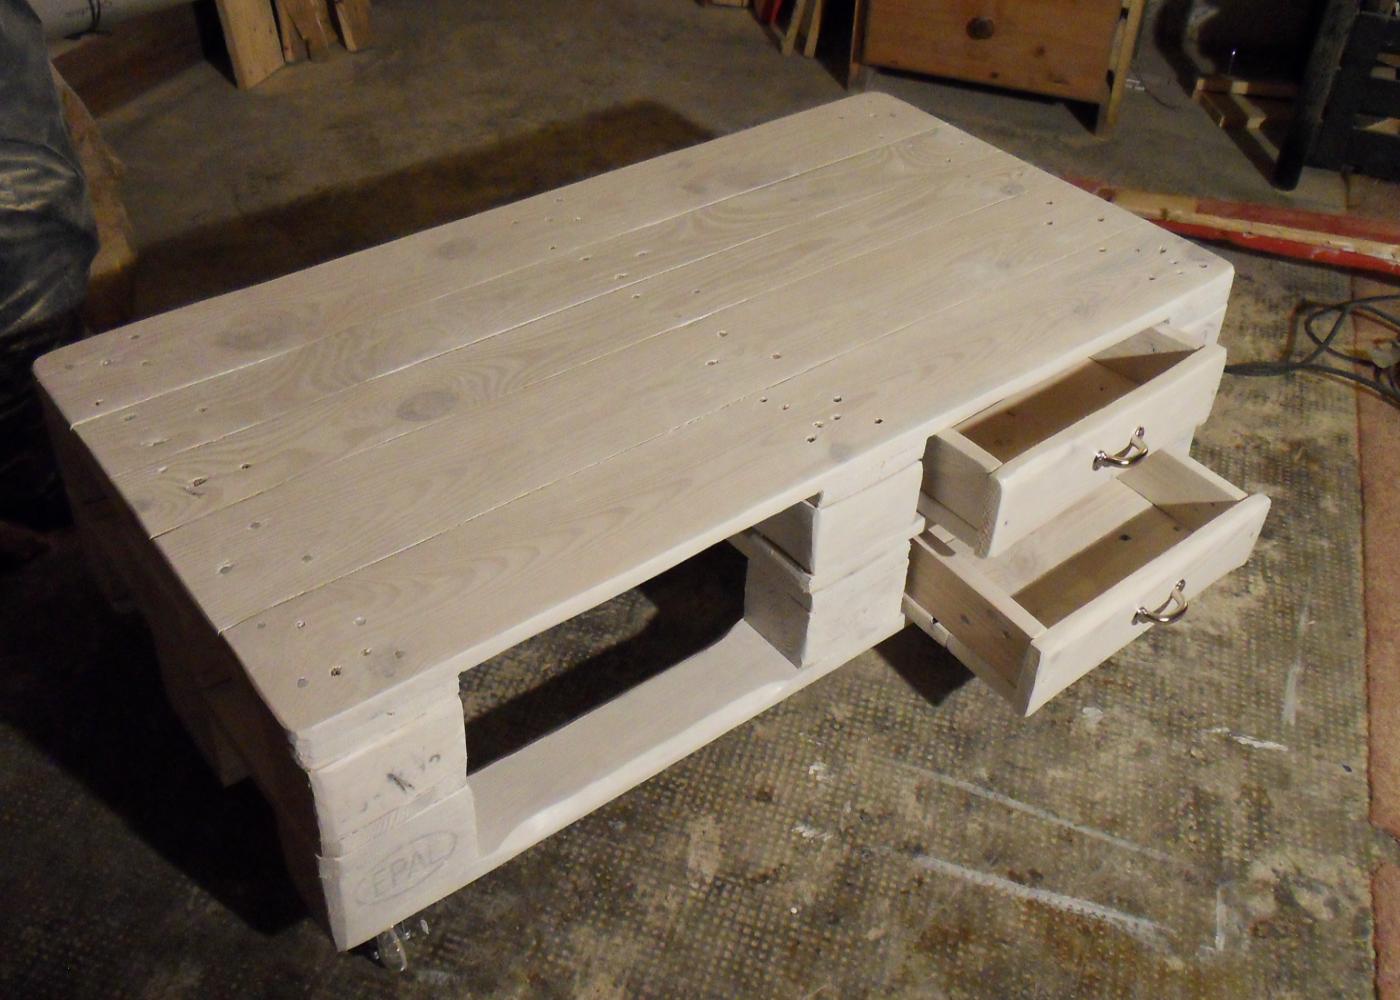
After part one of the Steampunk desk construction, now on to the second and last. And a lot of detail work, but I’m getting ahead. The plan: a desk made of of two halves, each with a “computer cabinet”, one speaker, one display and a dashboard – the first with the amplifier and the small TOR server, the second with the workstation. Technically, both computers in the respective cabinets, though the one i build now needs some more space – talking hard disks, a standard size mainborad and stuff. Nevertheless, i’ll need one pallet for the desktop, half a pallet for the cabinet footer part. Have them cleaned, sanded and prepared for further construction.
Thats lightly written, but at this point i was slightly exhausted: you know already from the first part that you have a little more wort than you expect, and also that the second part will become a bit more difficult, so… well. Get on with it. It really was great fun, but you hate the grinding jobs sometimes. Also keep in mind not to underestimate material requirements – it doesn’t really look like it, but the result consists of rather six than less pallets. Two for the tabletops, two for the cabinet feet (you have wood overhead here, but it gets used up). Another half pallet i collected somewhere, and about one and a half disposable pallets i recycled from the old desk, which i tore down while building the new one.
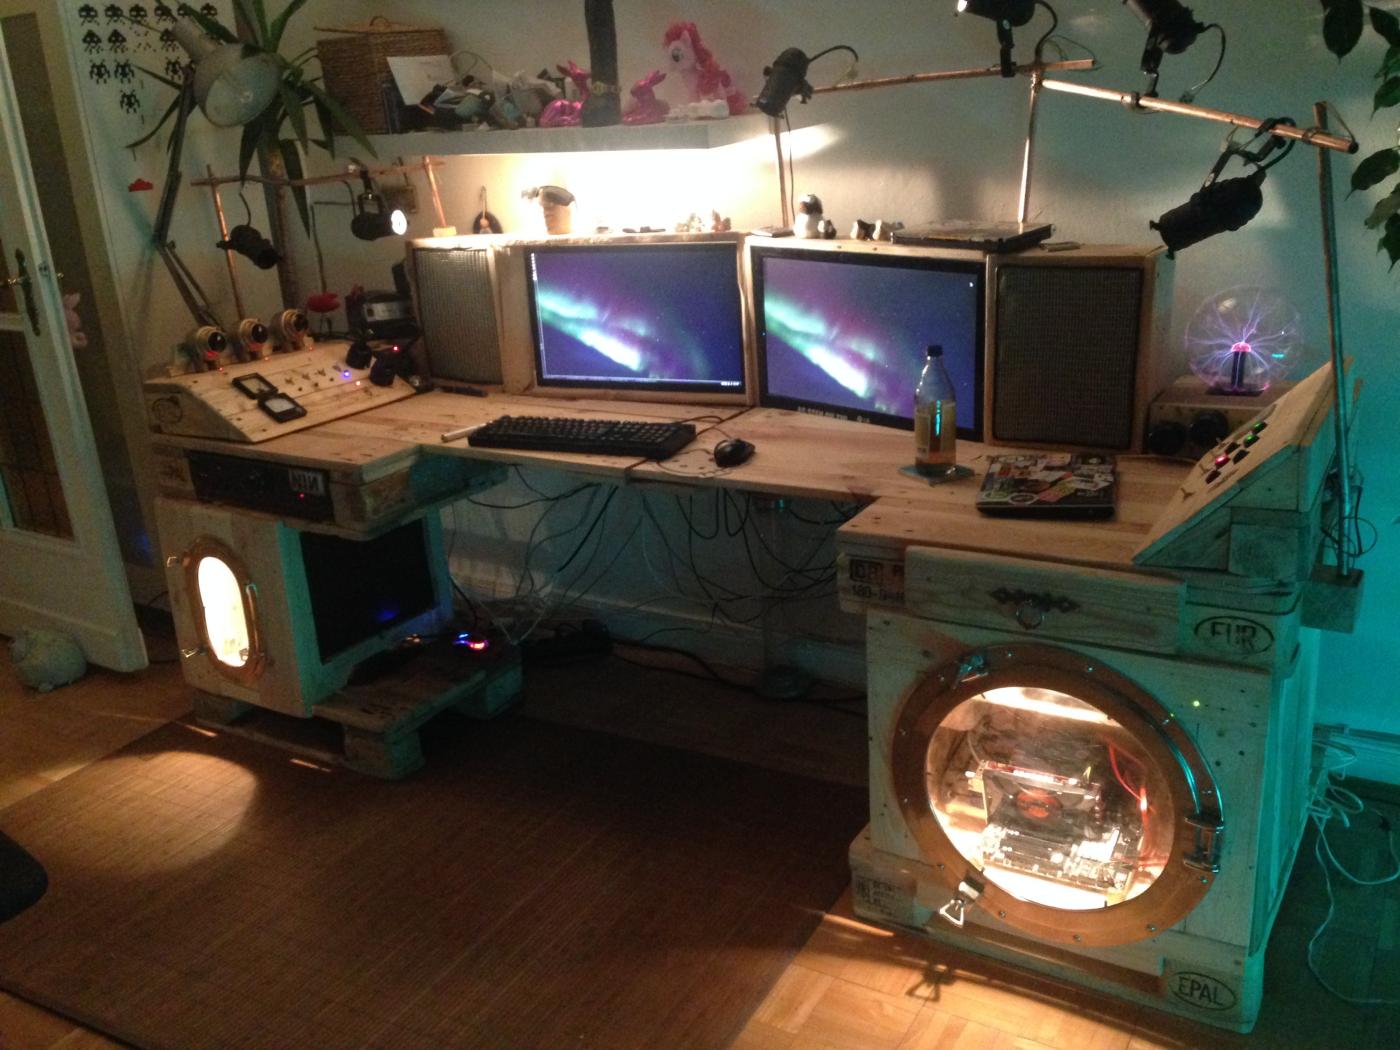
Switch-on at night – the video starts quite dark, but you get an impression 🙂
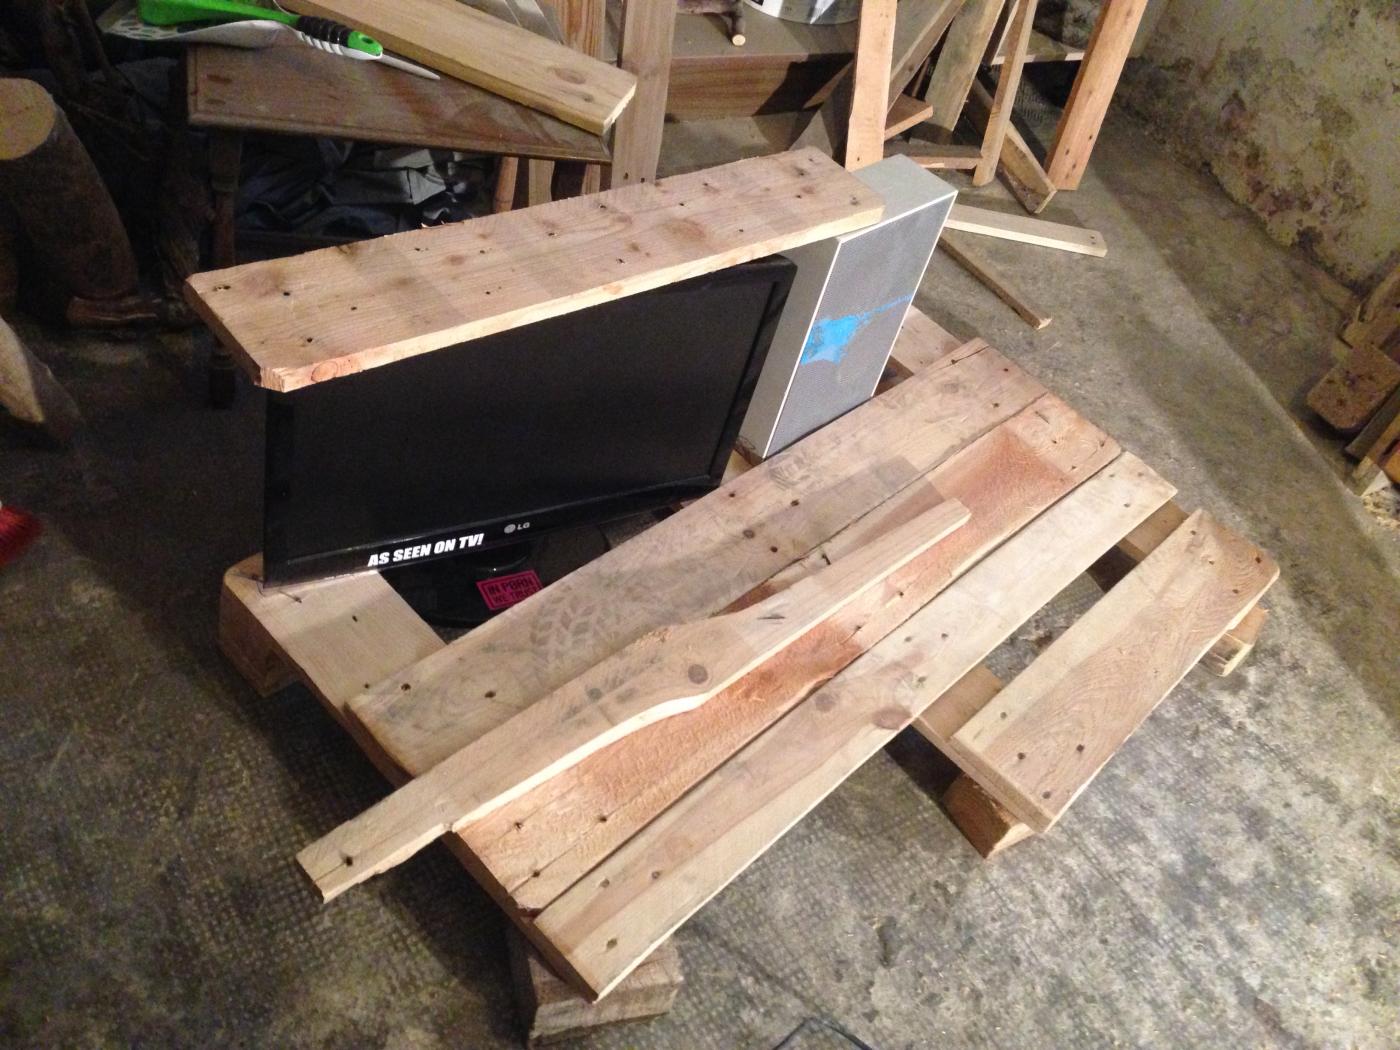
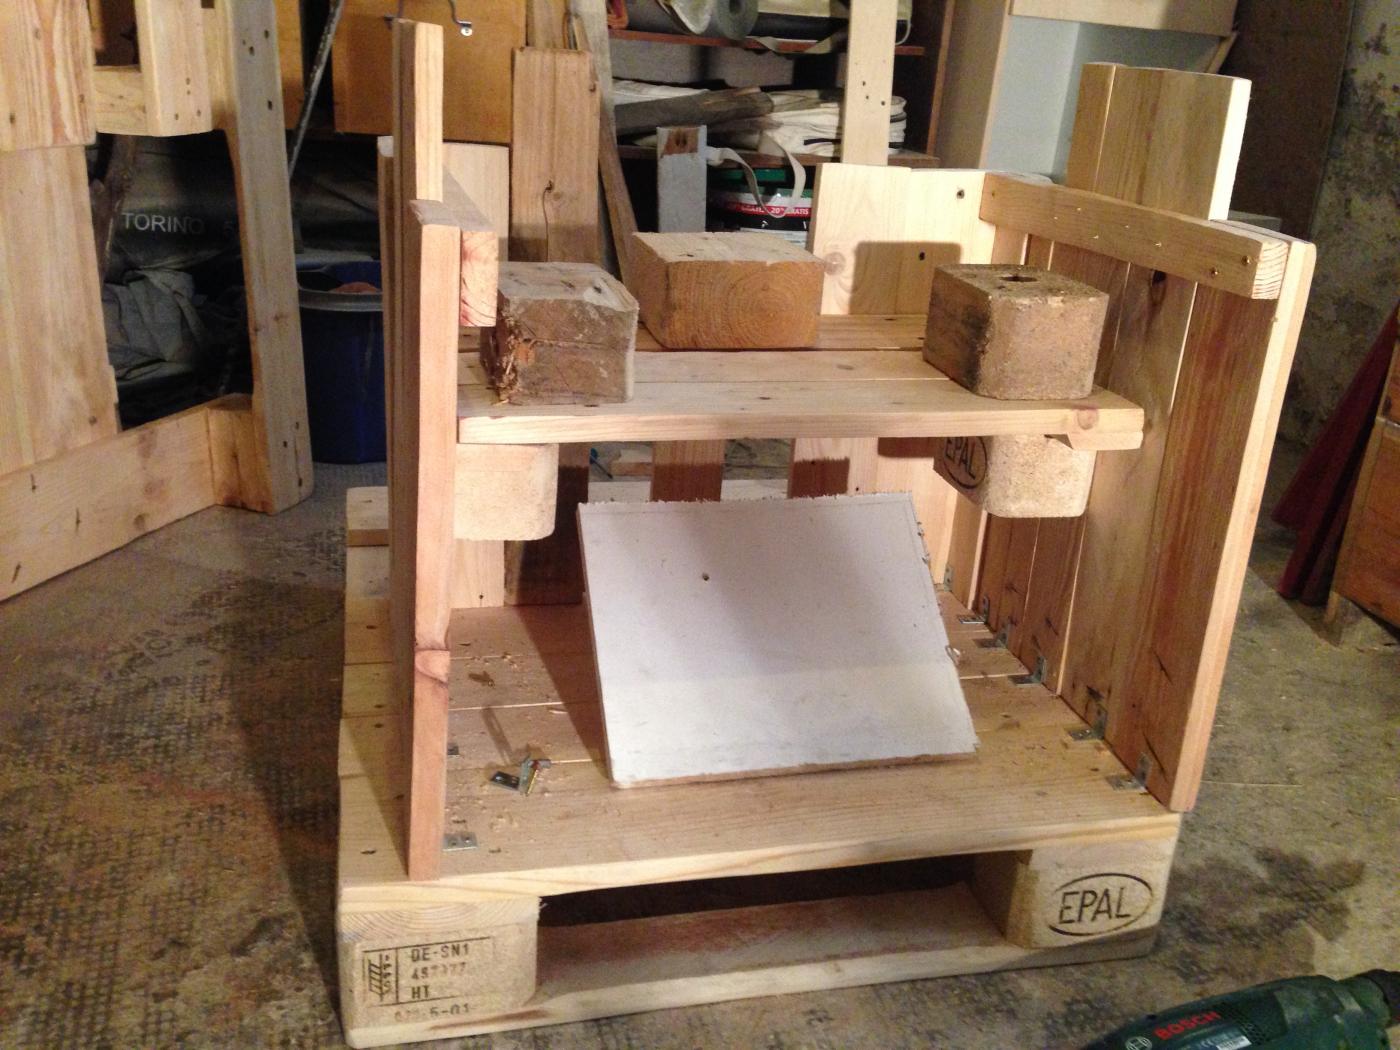
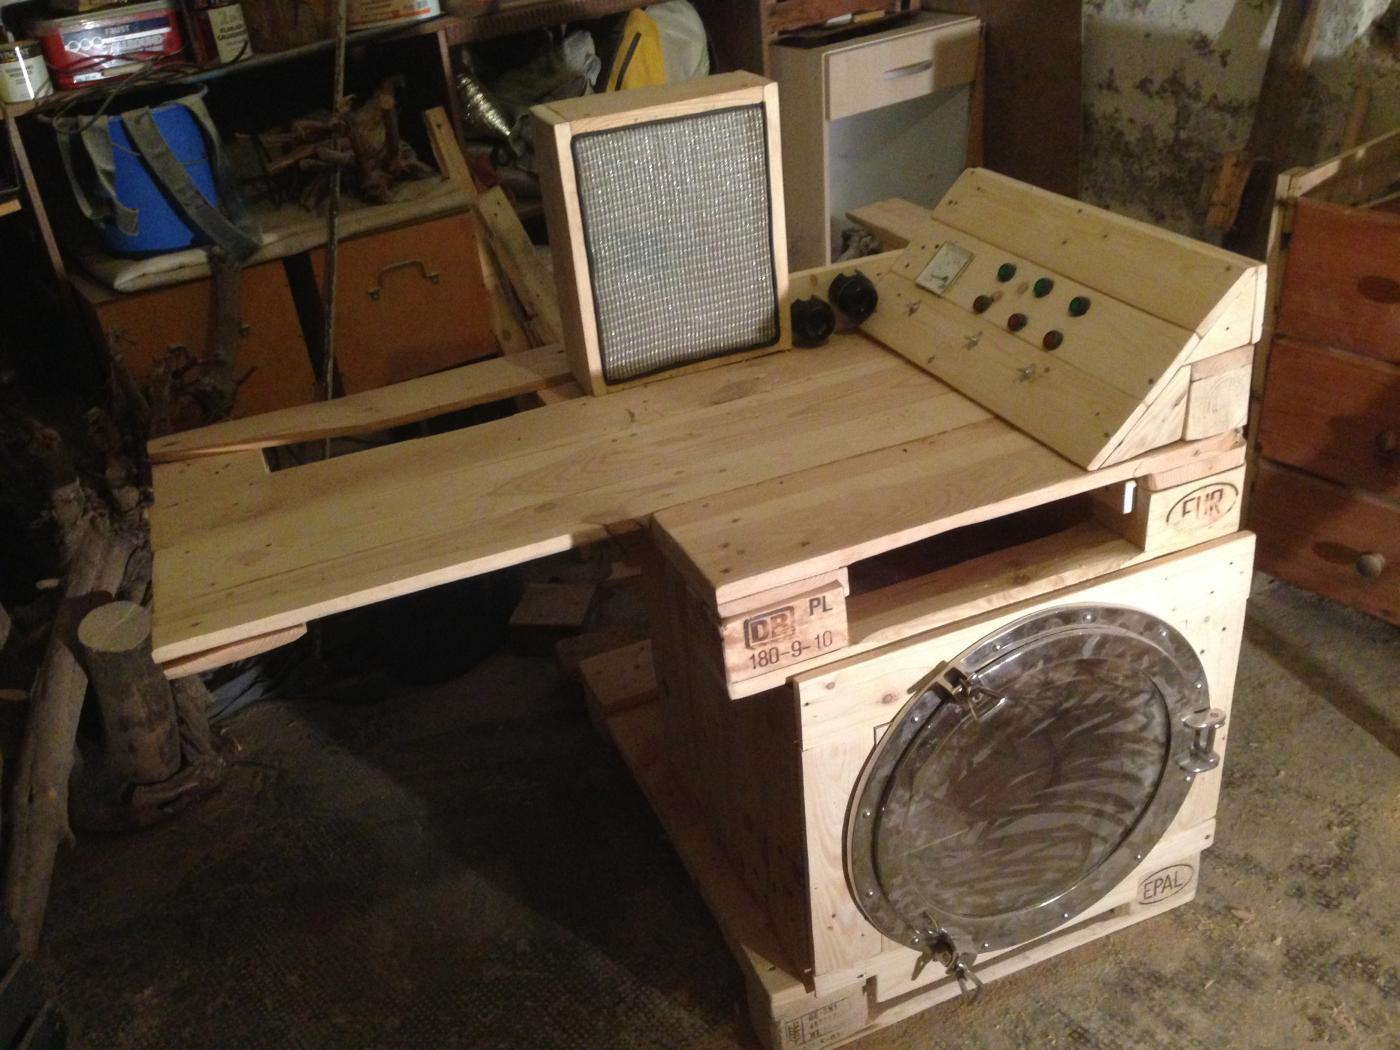
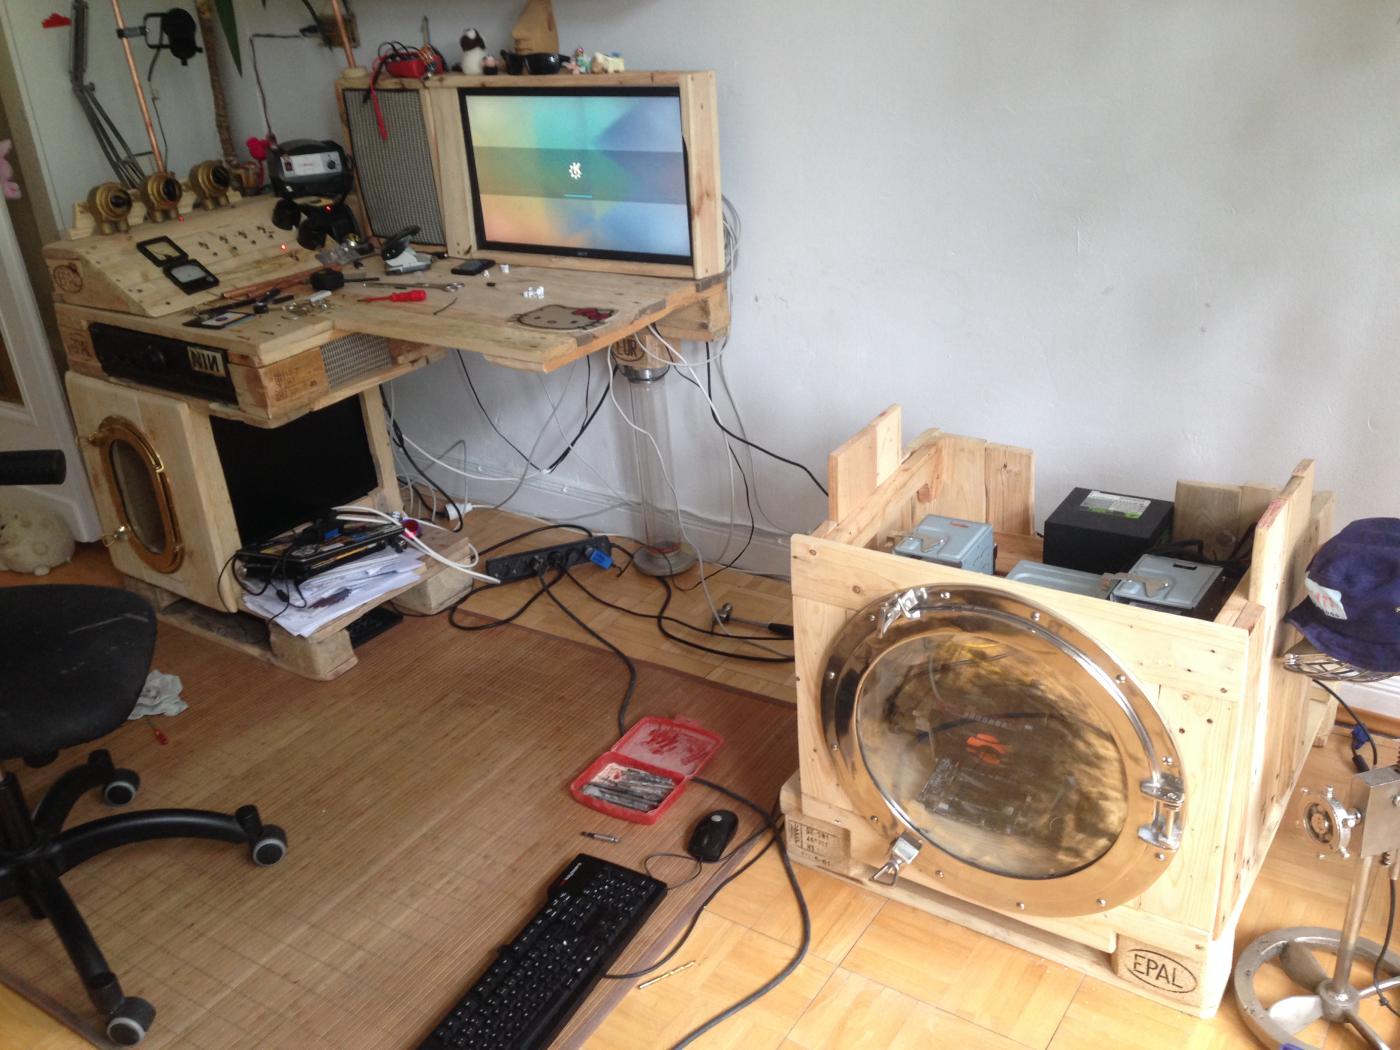
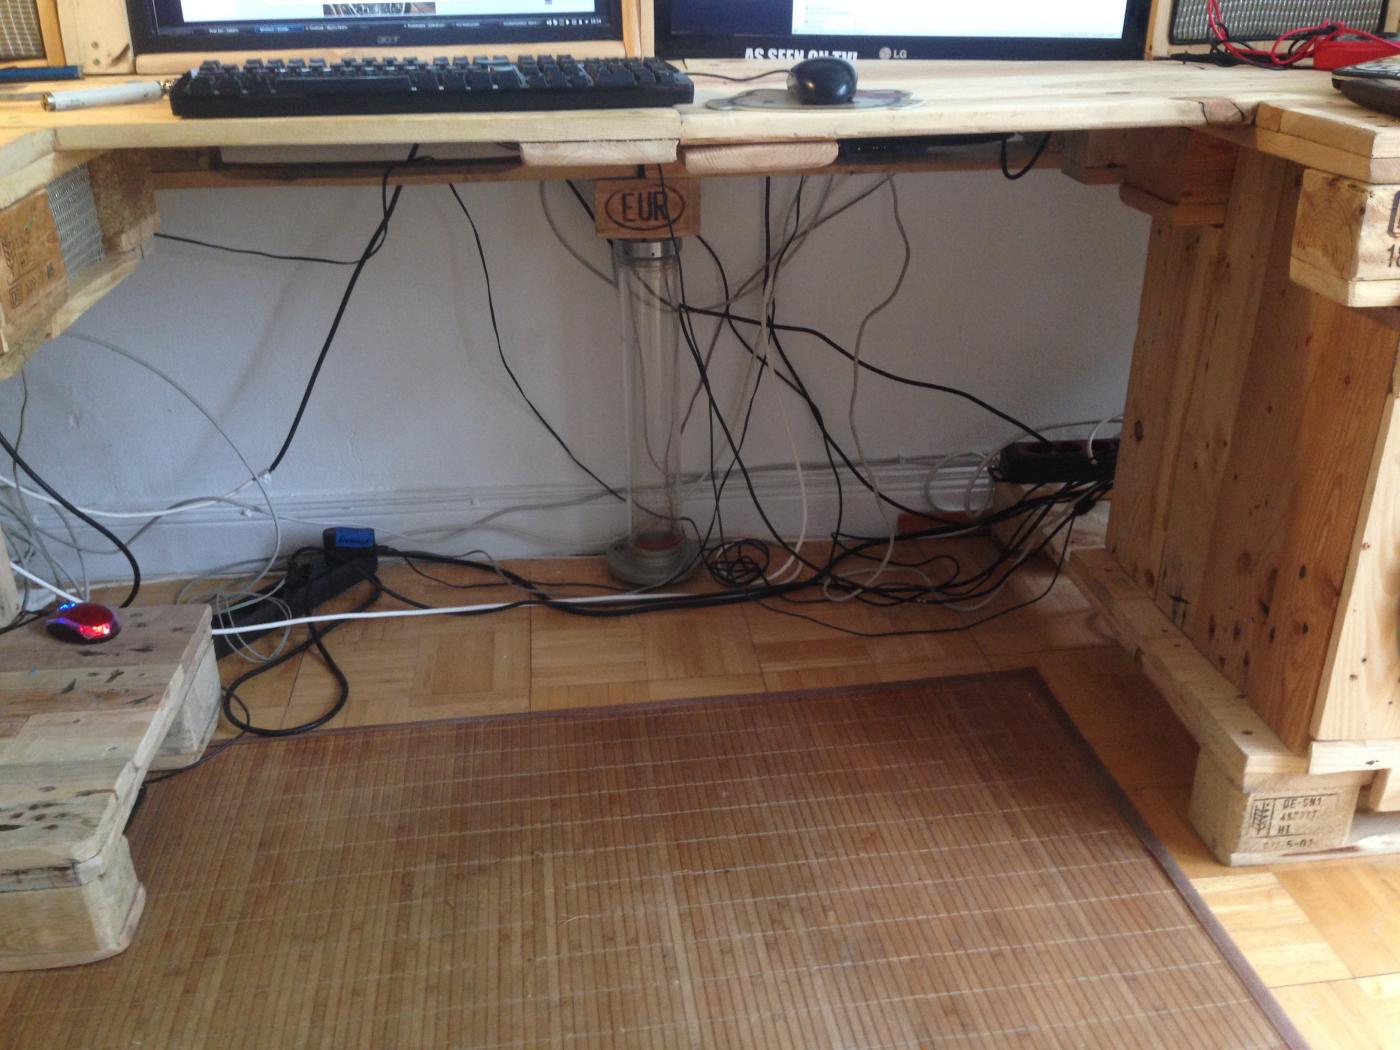
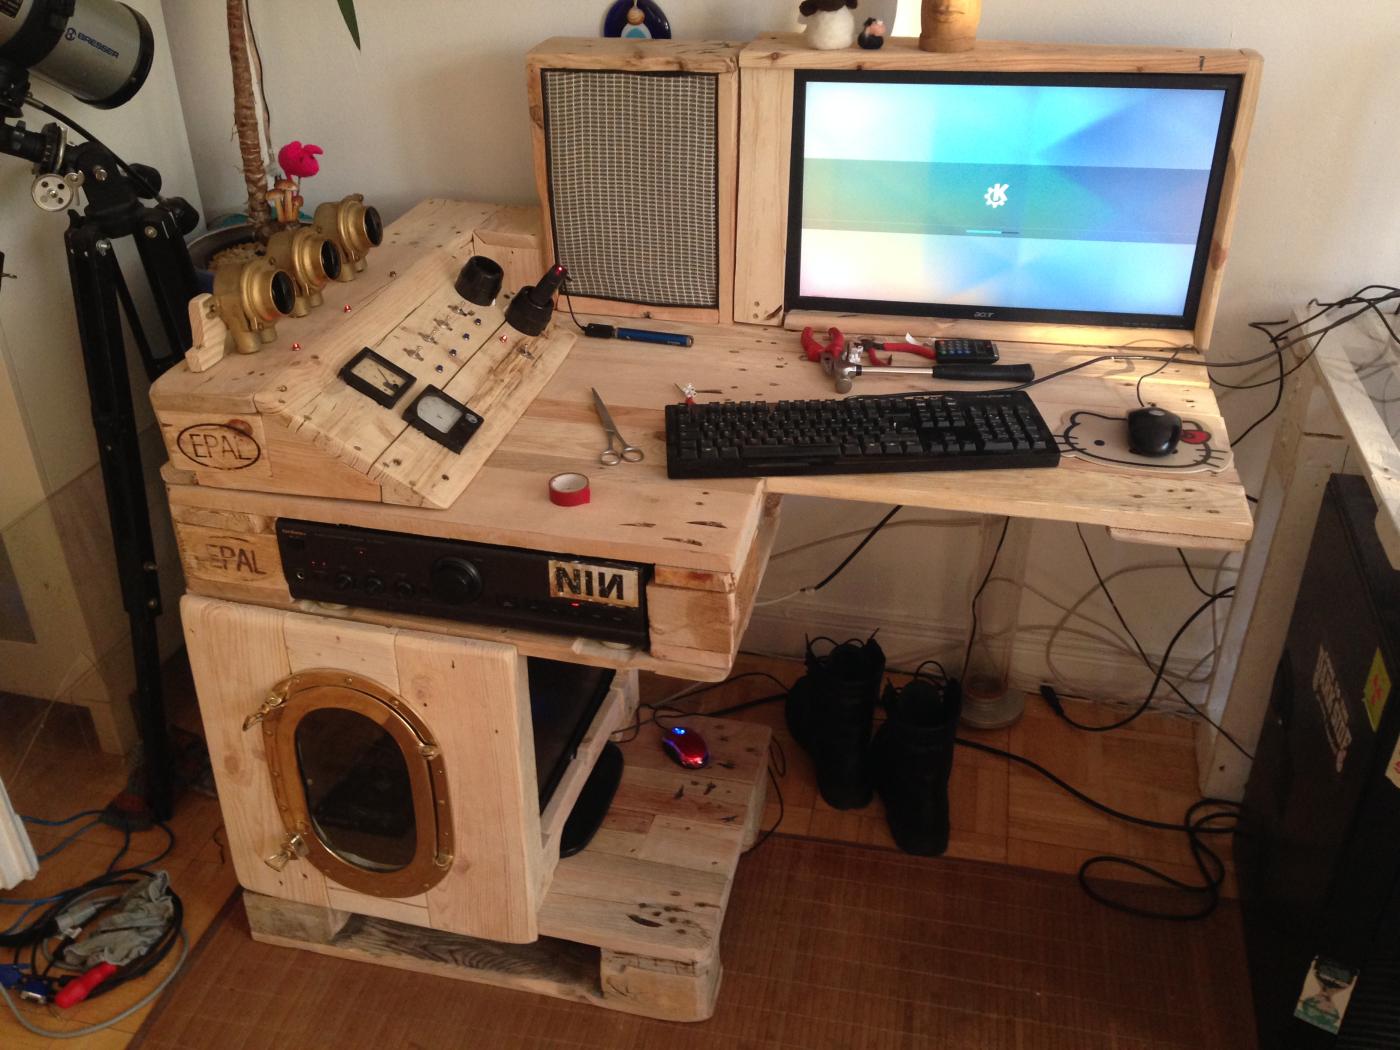
We have the raw construction, so lets start with the hardware integration. I made two slightly different (and fiddly) solutions, since the Acer display and the LG monitor have totally different external dimensions. It was impossible to put them “side by side”, but I came close at least. The Acer has some support, to get the display slightly higher, while the LG is inserted into the tabletop. As a result, they have about the same height and the displays are mostly adjacent. With two identical monitors, you’re of course better served. You don’t see it here neither at the end end result really clear: the LG has a slightly steeper angle, protruiding further into the desk space. I wanted a little more space at the back behind the dashboard because of the plasma ball.
The spacings for the monitor and the speaker are made: for the speaker, i placed an extra board with pallet spacers underneath, since the speaker is too large to be put simply on the rear pallet board. We put both items in place, for testing purposes.
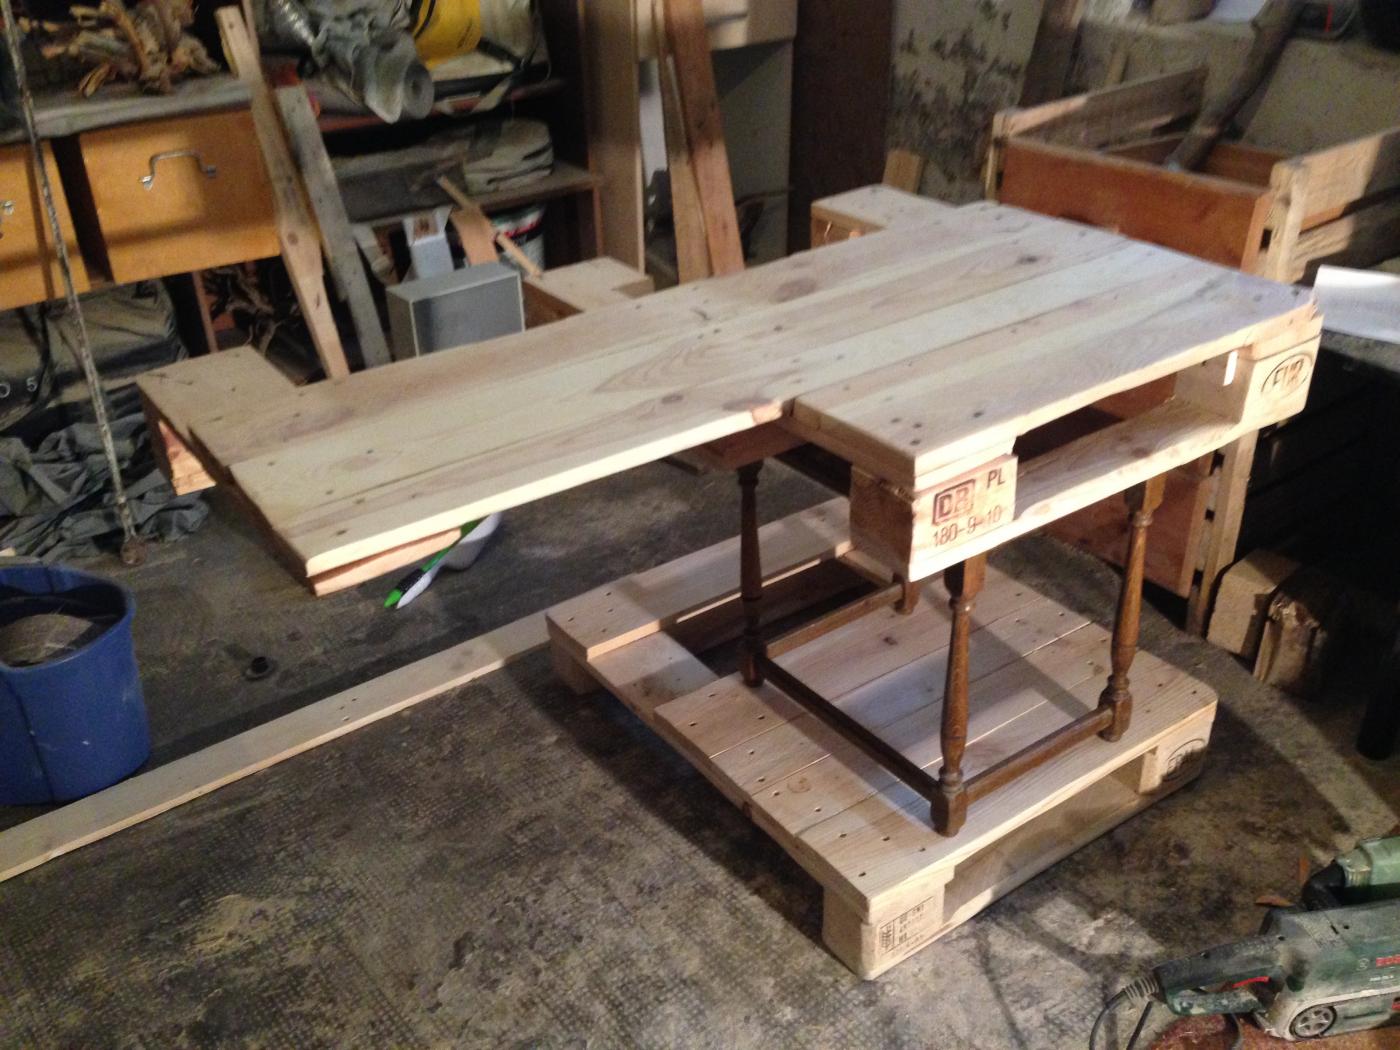
Luckily, (well, you can use any support structure for setup): with the little side table I reached exactly the needed 74cm tabletop height. Now: fix the sideboards.

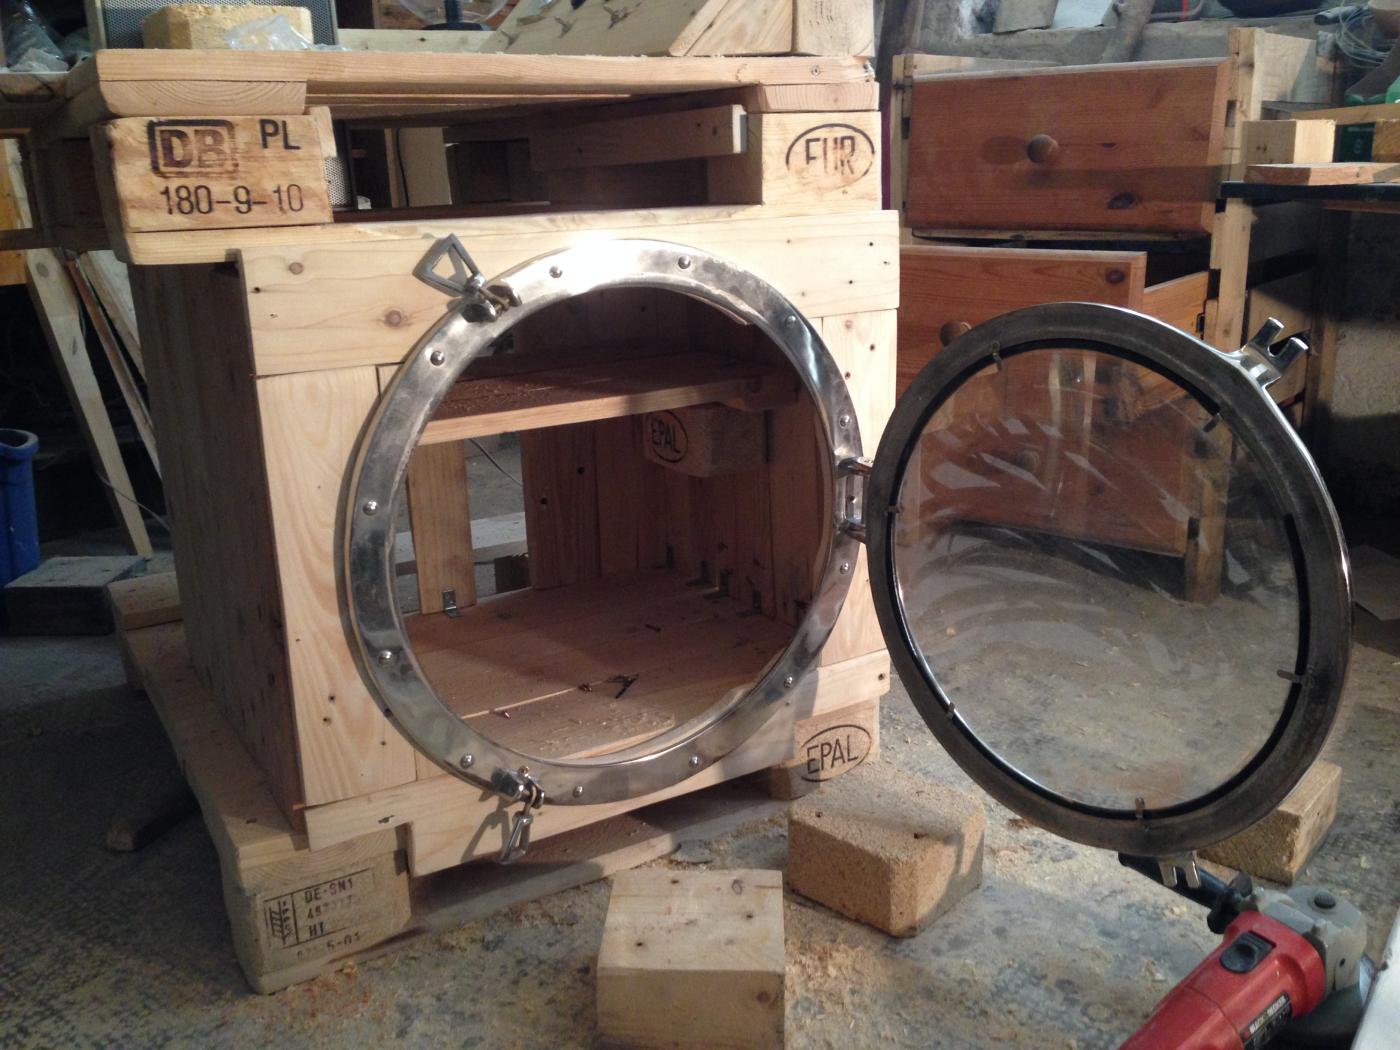
We have our cabinet shell, so lets test the porthole installation. Checking in advance, how height and width fits. Funfact: there was a glass and a mirror variant. I wanted glass of course, but got mirror. I took the mirror part out easily and sanded off the back coating. I left some signs of the coating – it looked kind of stained. Maybe I’ll make it completely clear at some point, at the moment, i like the look.
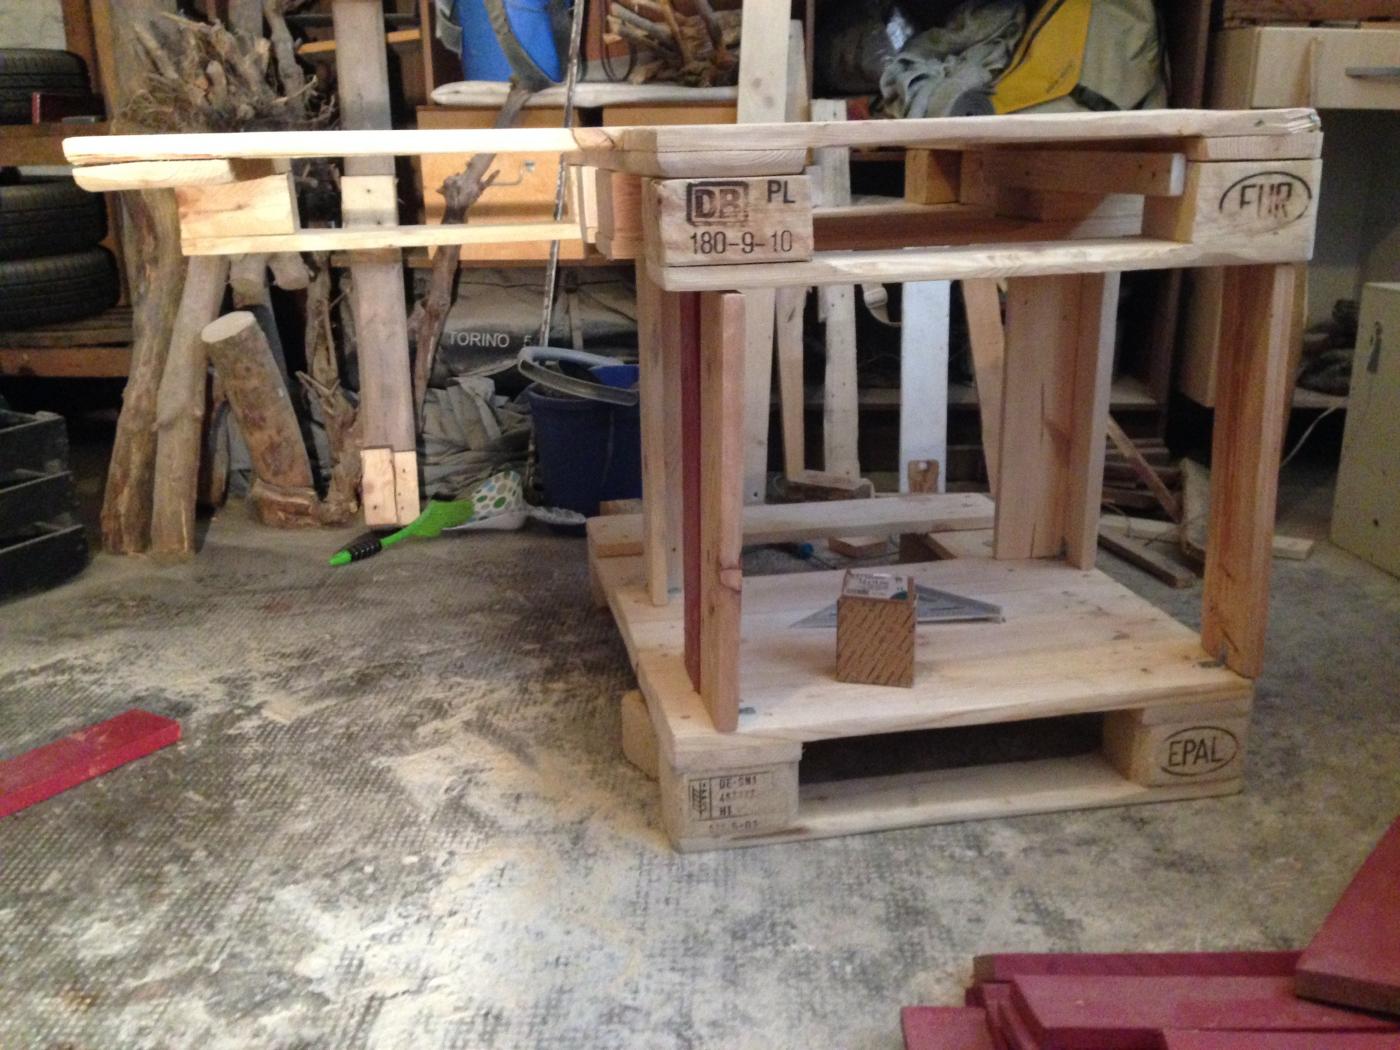
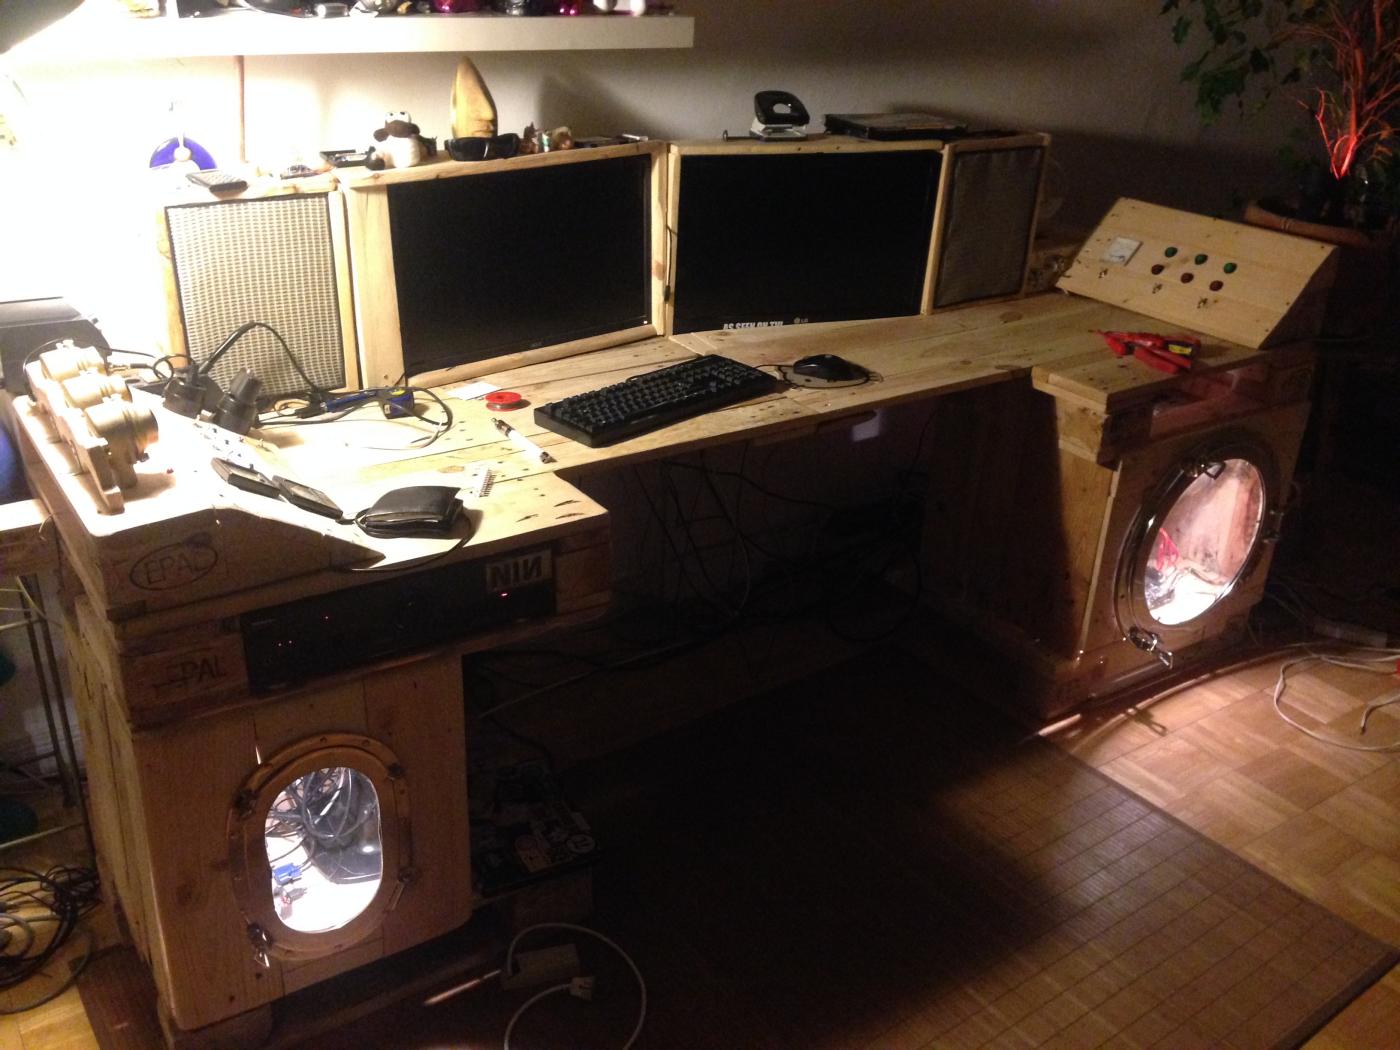
In the second image, you see how the side walls are adapted (well, mostly) to the tabletop substructure. Aim/results: I plug the tabletop onto the cabinet thats it. Stable, solid, no screws and strings attached. Again: if you mount that permanently, you’ll have issues reaching interiors at latter installations, and even more important: it gets too heavy and bulky to move around. As long as you work with some reasonable precision, it should become stable without further screwing.
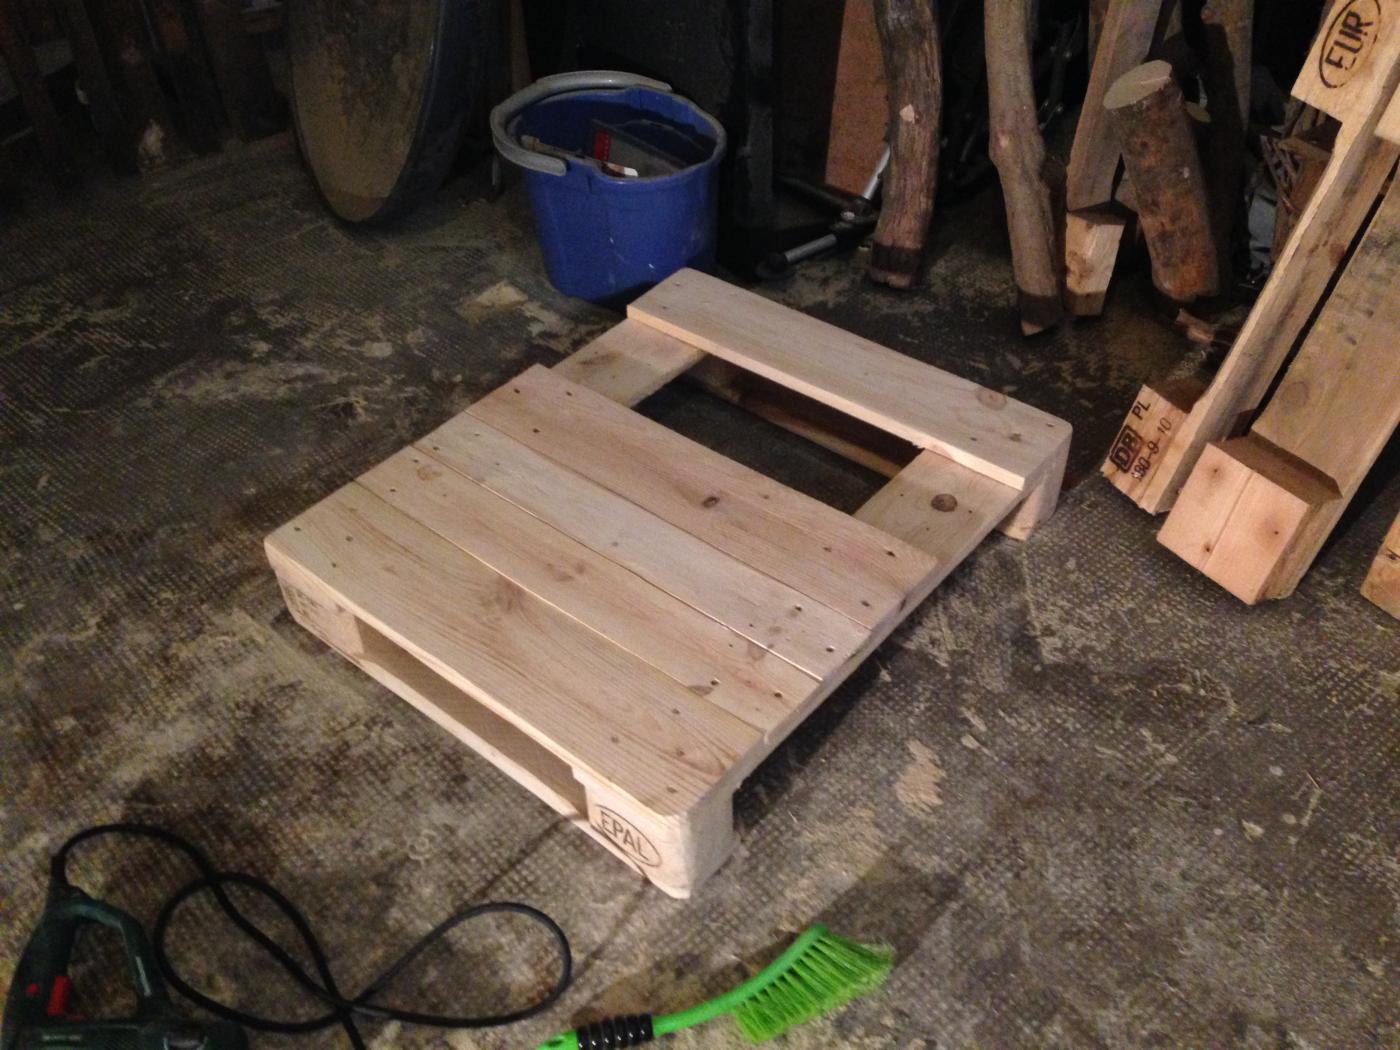
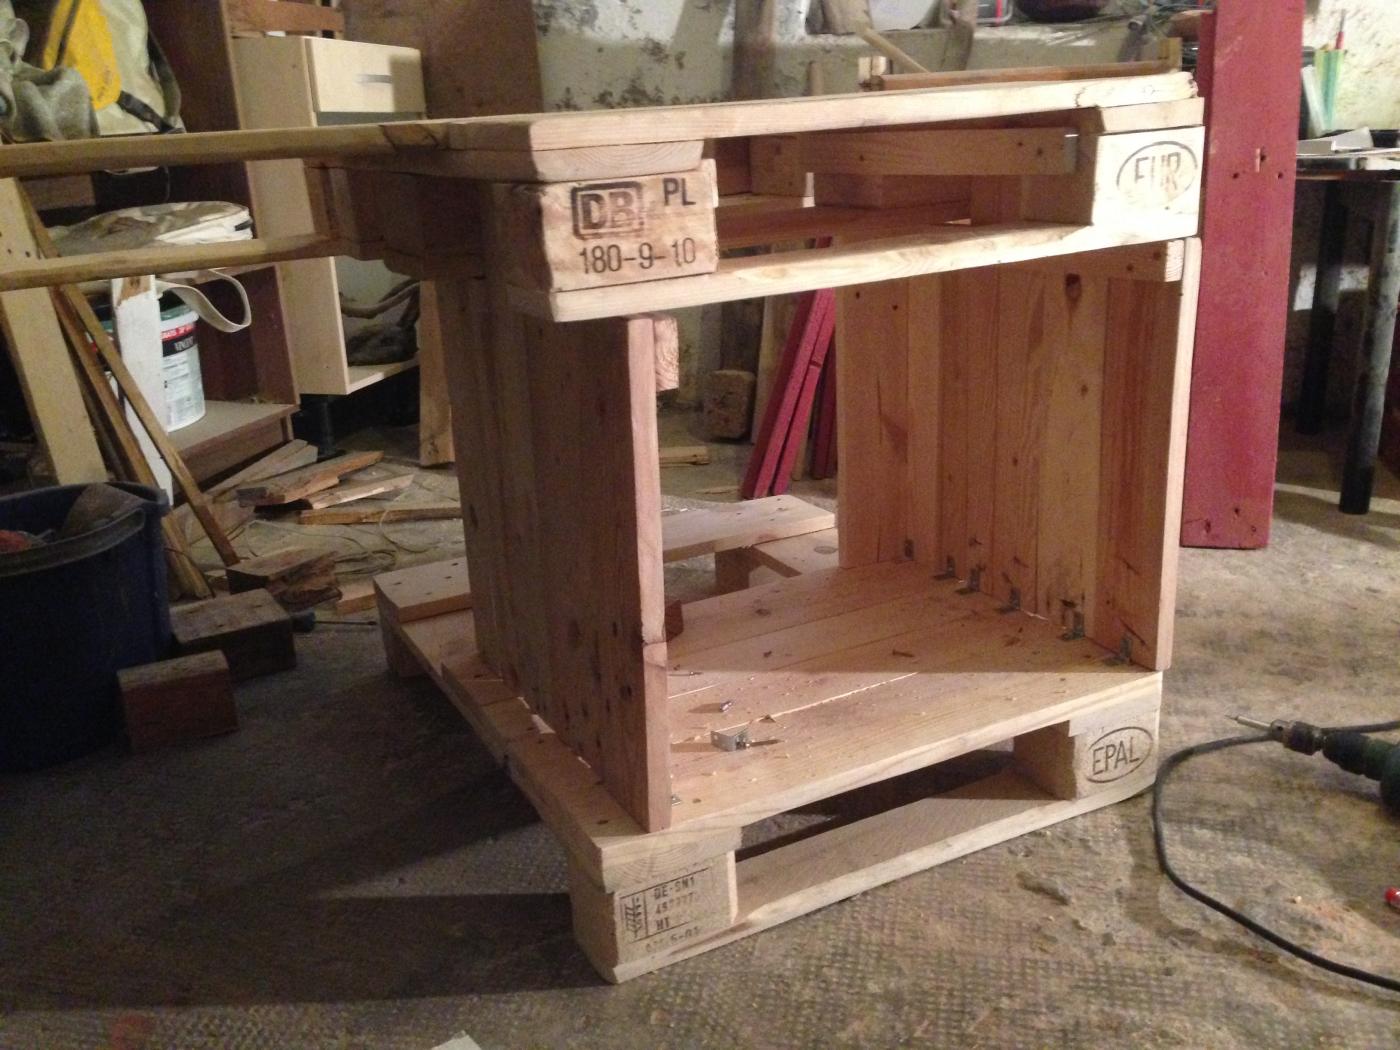
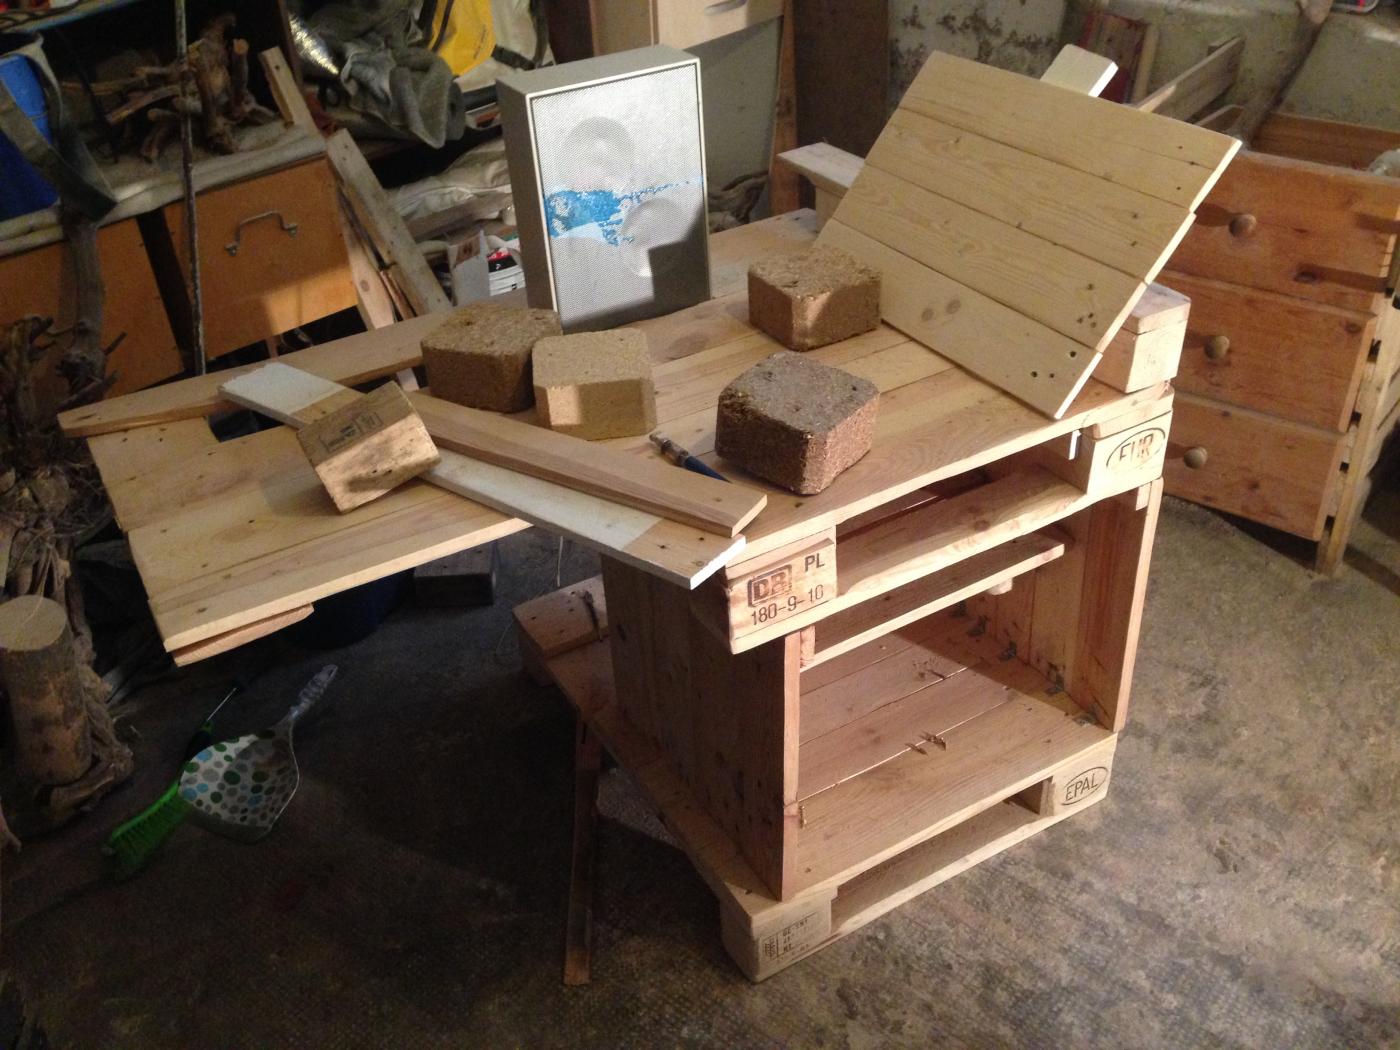
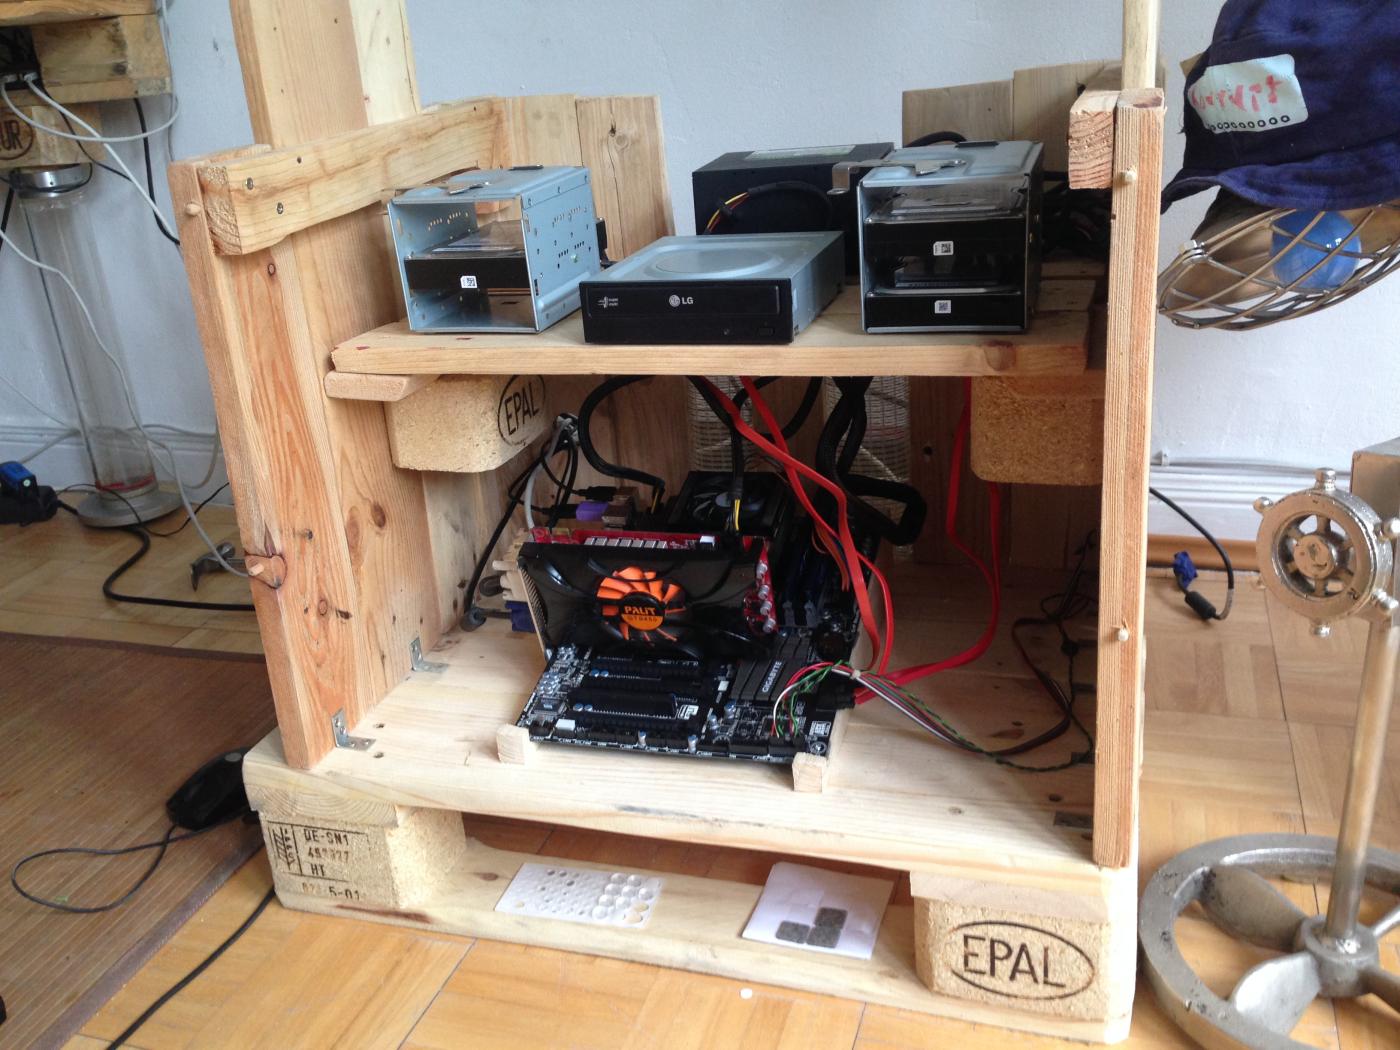
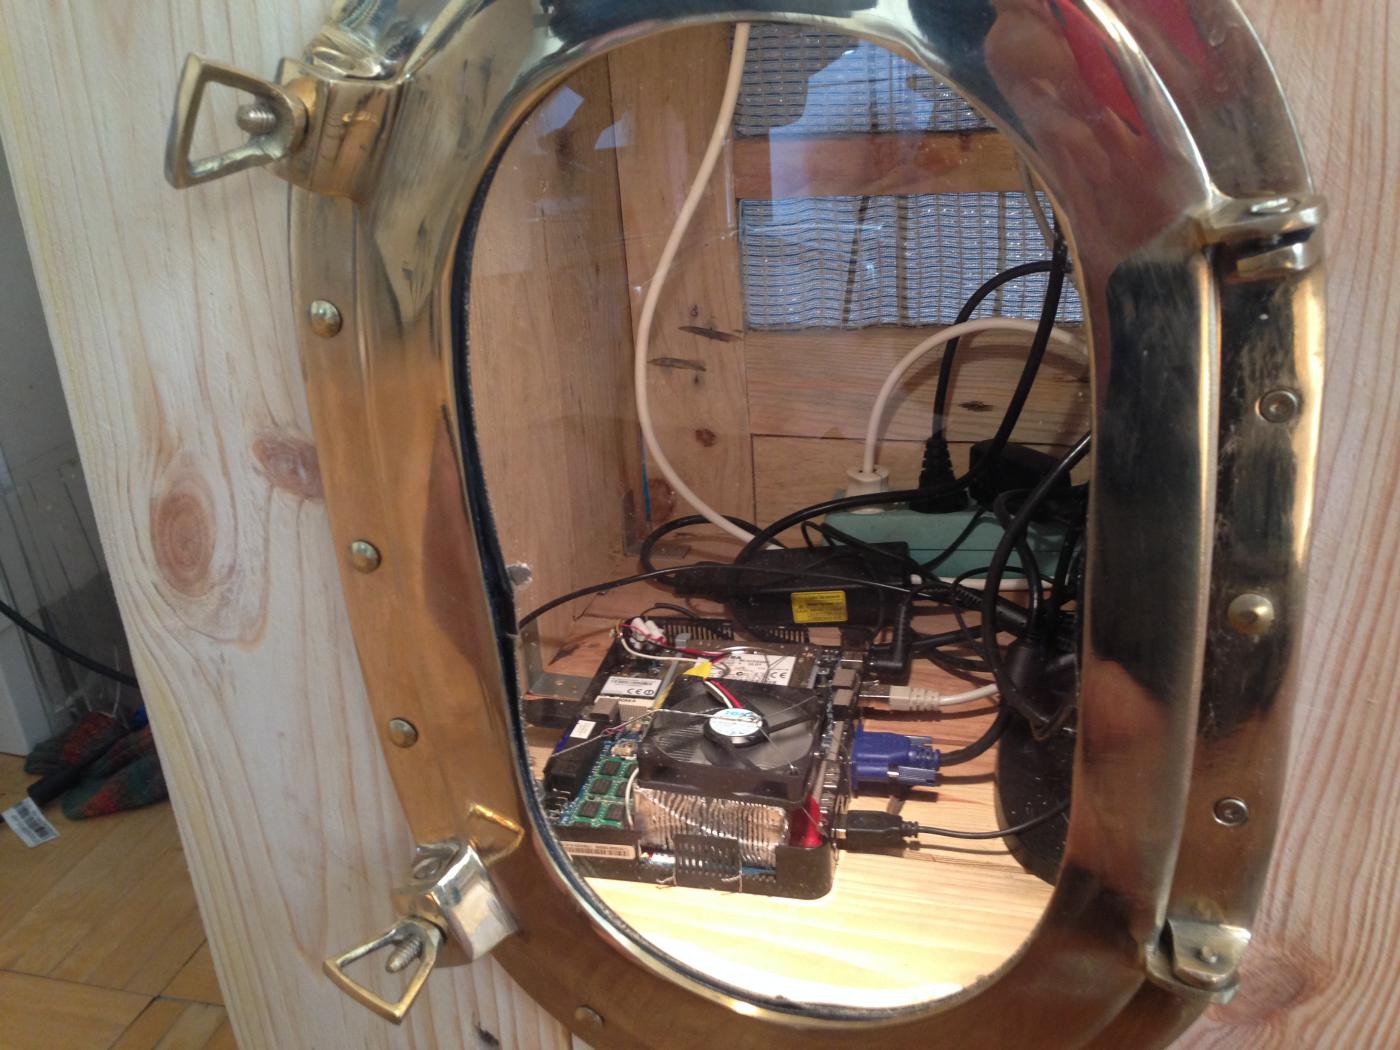
I didn’t want to dissect my computer before it was time, so i cutted a board to the size of my motherboard and used a few pallet spacers of the size of my hard disk frames and the power supply.
Then i built a floor into the cabinet in a height and size that mainboard plus graphic card and fans do have adequate space. Atop, there’s also space for power supply, hard drives, and i can even put the DVD burner in front, reachable through the open porthole. I won’t need it often, i guess, but when needed, it should be useable without removing screws, panels and the like.
All distances here had some safety margins, which was a good thing: main goal was an accessible DVD drive and enough space for HDs and power supply. I kept this space small to be safe below (also regarding cooling issues). As it turned out that I could not install the motherboard “vertically”, as planned here (since my SATA Cables were too short/the ports placed in an unlucky way). Instead of purchasing longer cables, I rotated the motherboard for 90° and there we are.
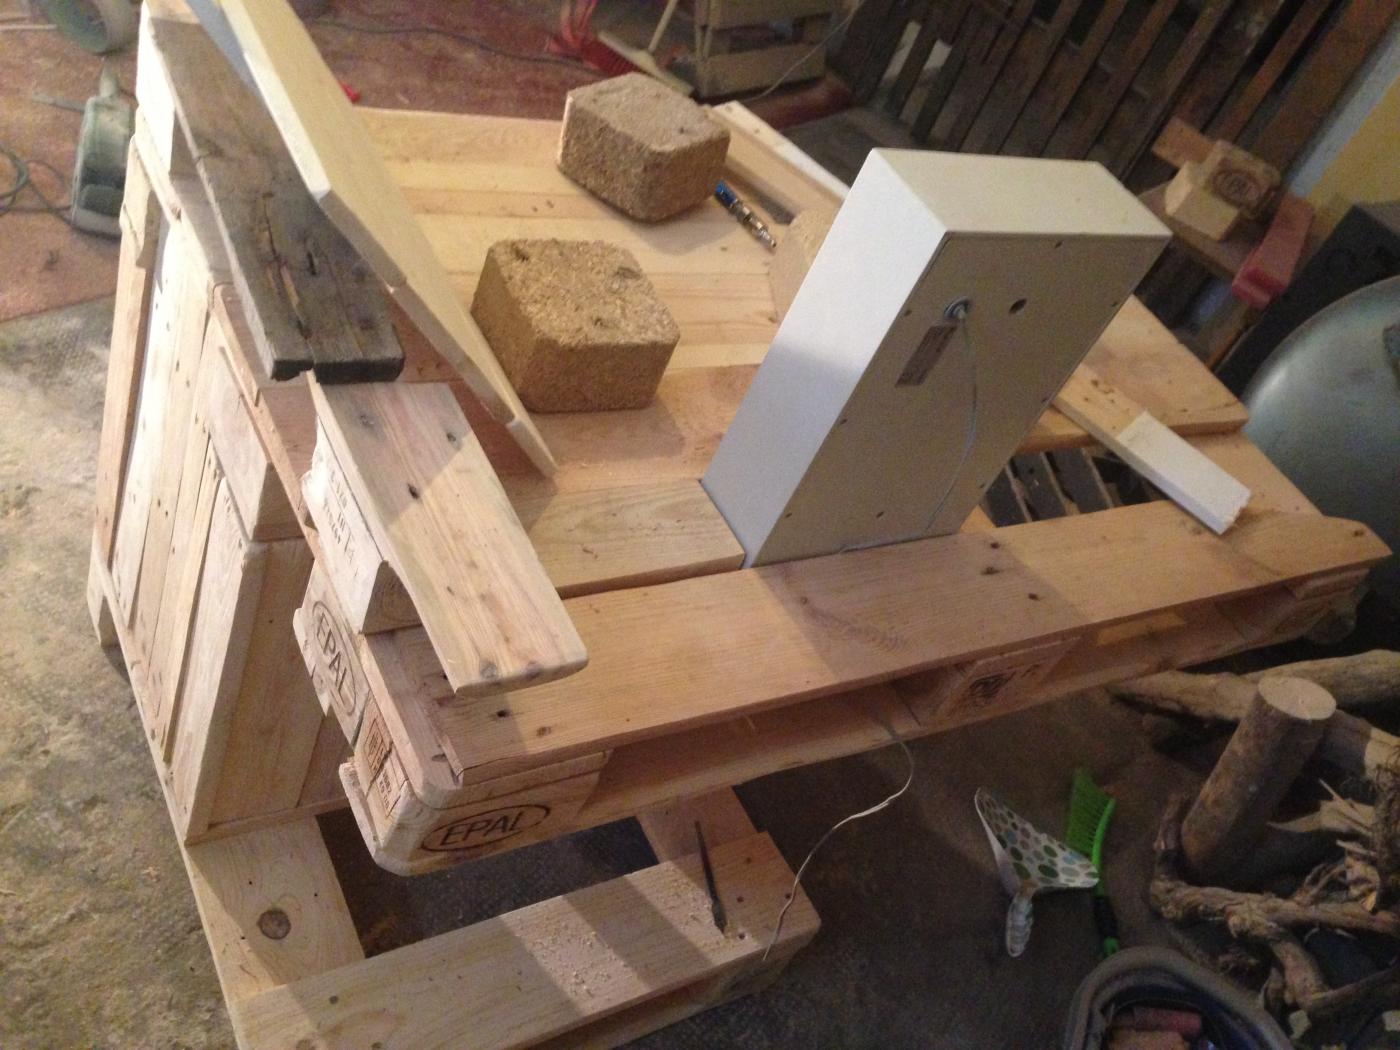
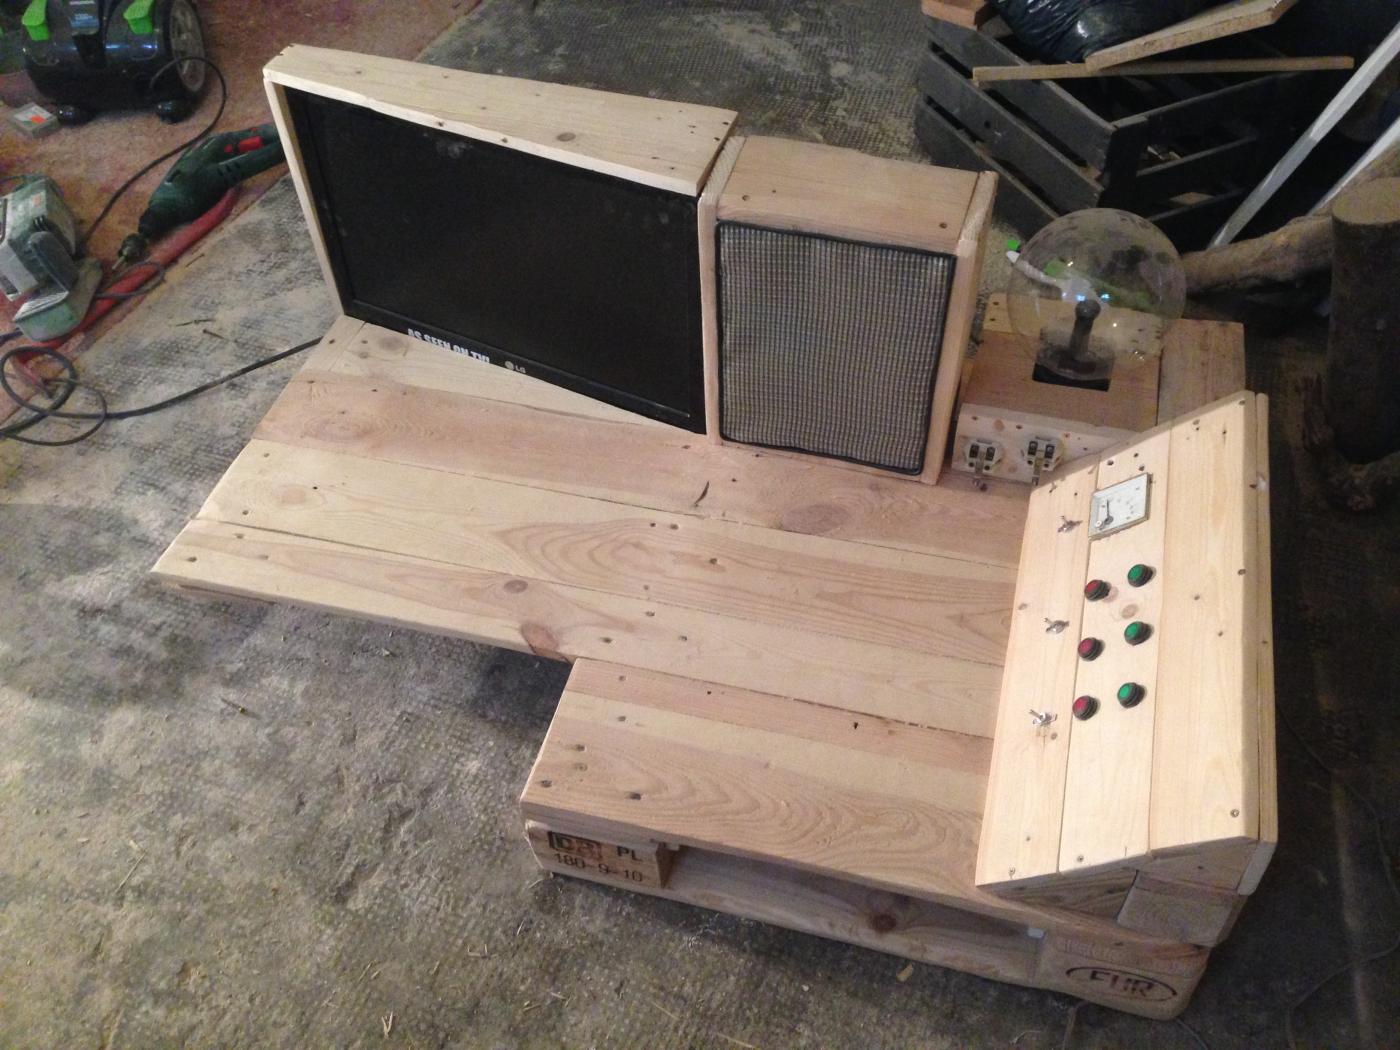
Dashboard design testing. Four boards were too high/too steep, but I wanted to avoid symmetry to the other one. So this one will become steeper and “more pointy”, leaving more free desk space in front for other usage.

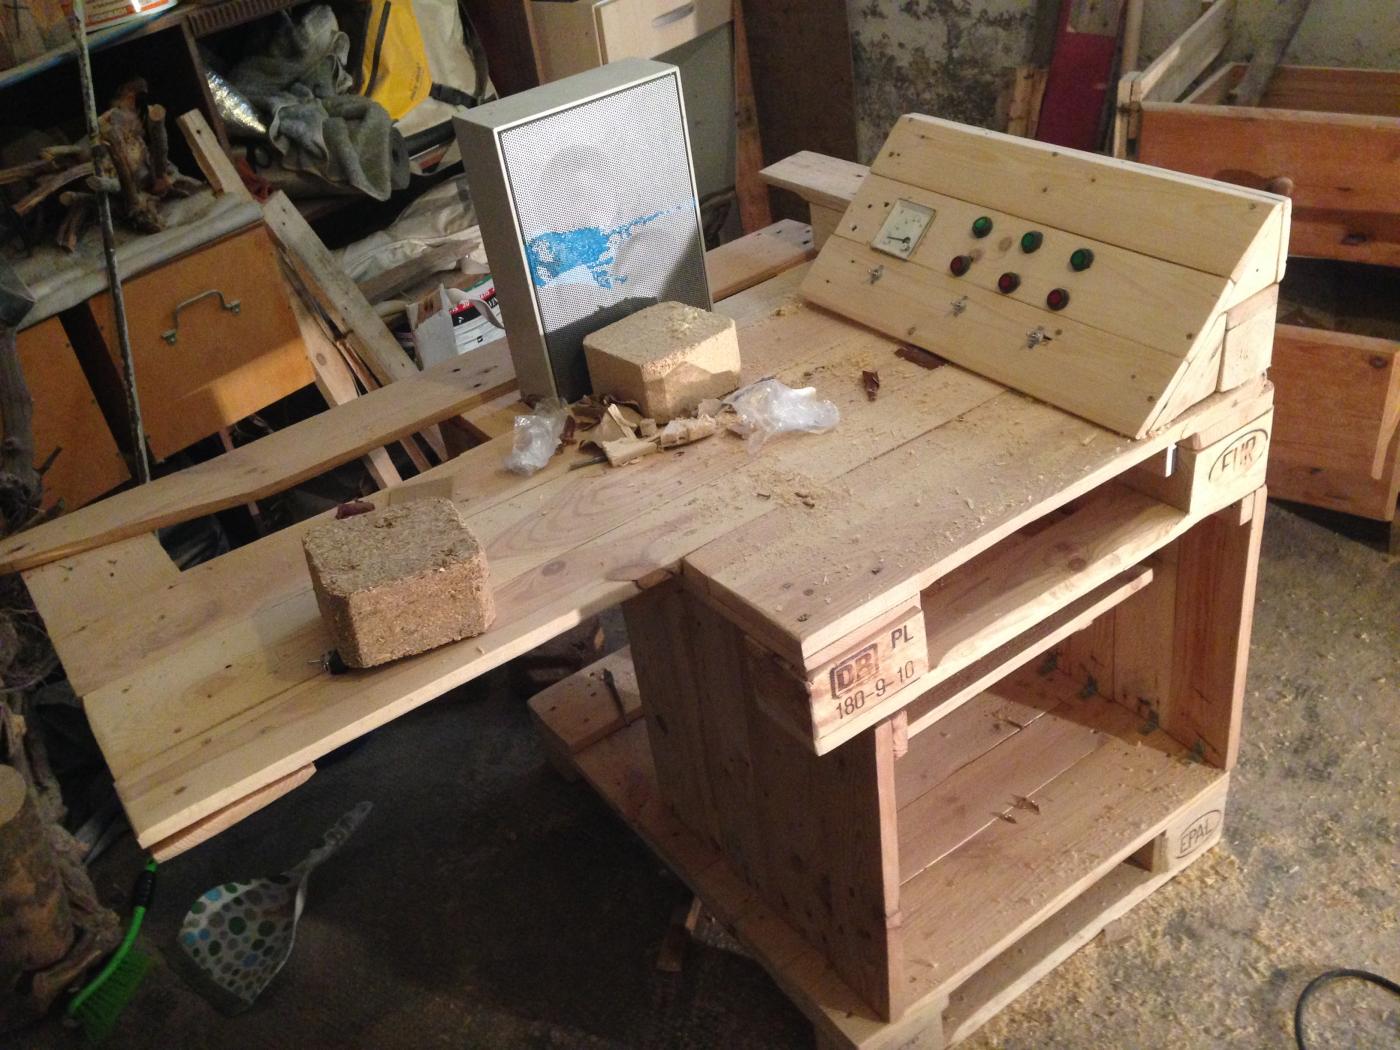
Substructure of the switching panel: simply a pallet footboard cut to length of the entire table width, and a gap below the actual panel to provide enough space for wiring and inserted electronics.
Three boards for the panel, plus a “back cover”. Cut side boards to size, fix with screws, and voila, its stable enough to drill and cut all the holes and gaps needed for the installation of switches, LEDs, voltmeters and the like.
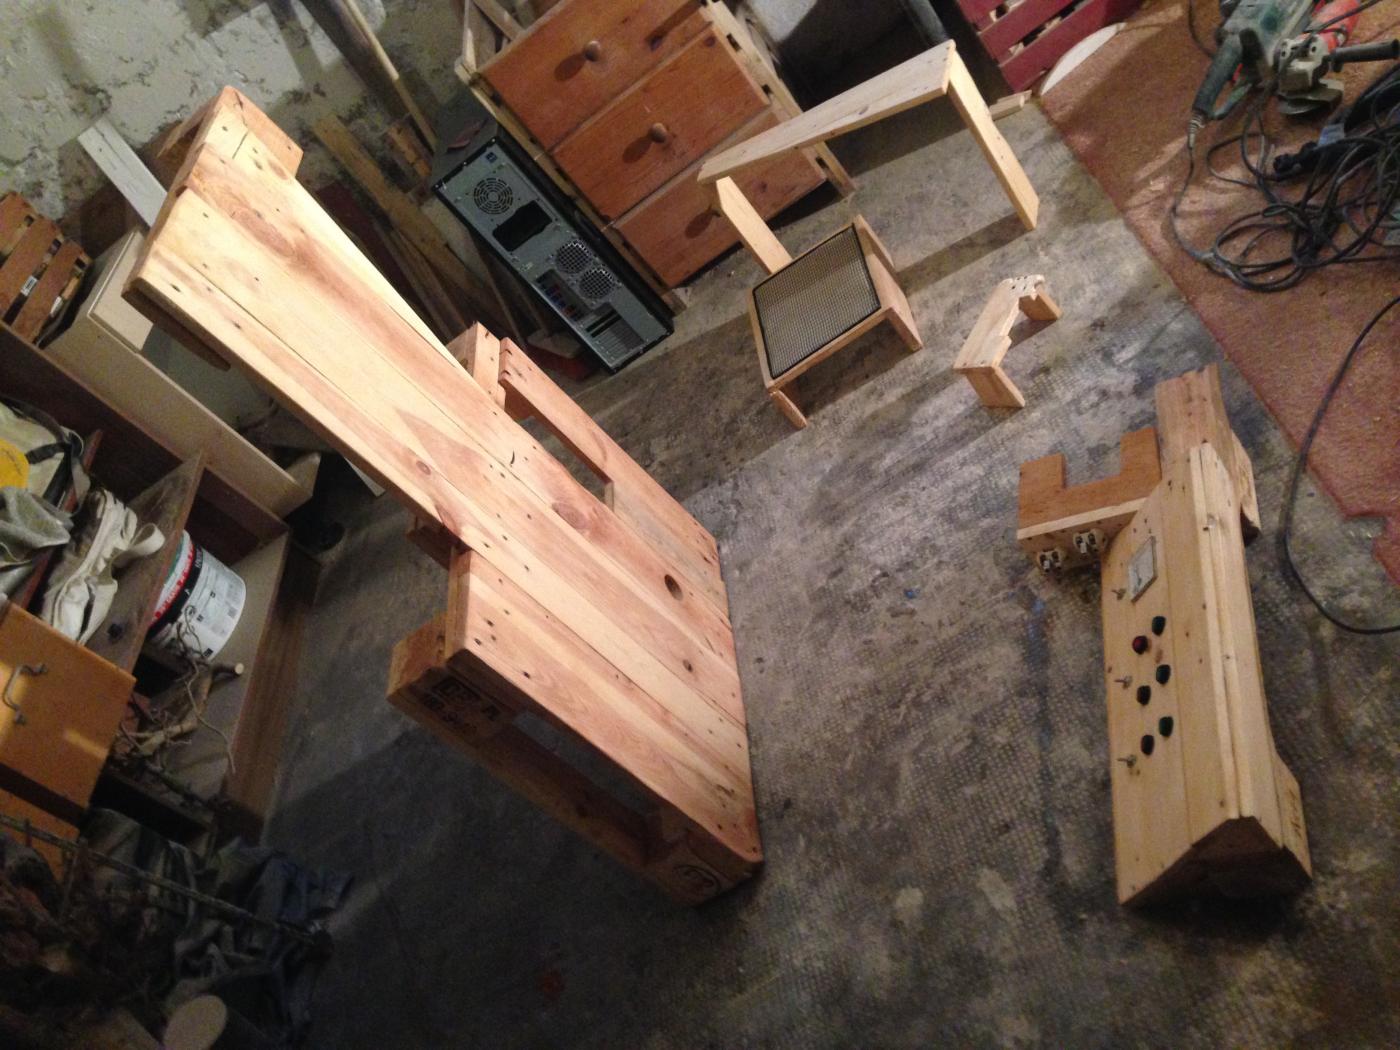
I won’t comment every step again individually – some you know anyway from the first part. Its quite the same procedure to build the porthole frame, the speaker and monitor canvas etc.

Exciting part: installing the computer into the cabinet/desk. First, a short session of liquid bees wax varnishing, and then: upstairs with the whole thing.
Then install the disassembled computer, each part where it belongs – Mainboard on the motherboard tray, hard disks, DVD drive and power supply on the top shelf. Wire up.
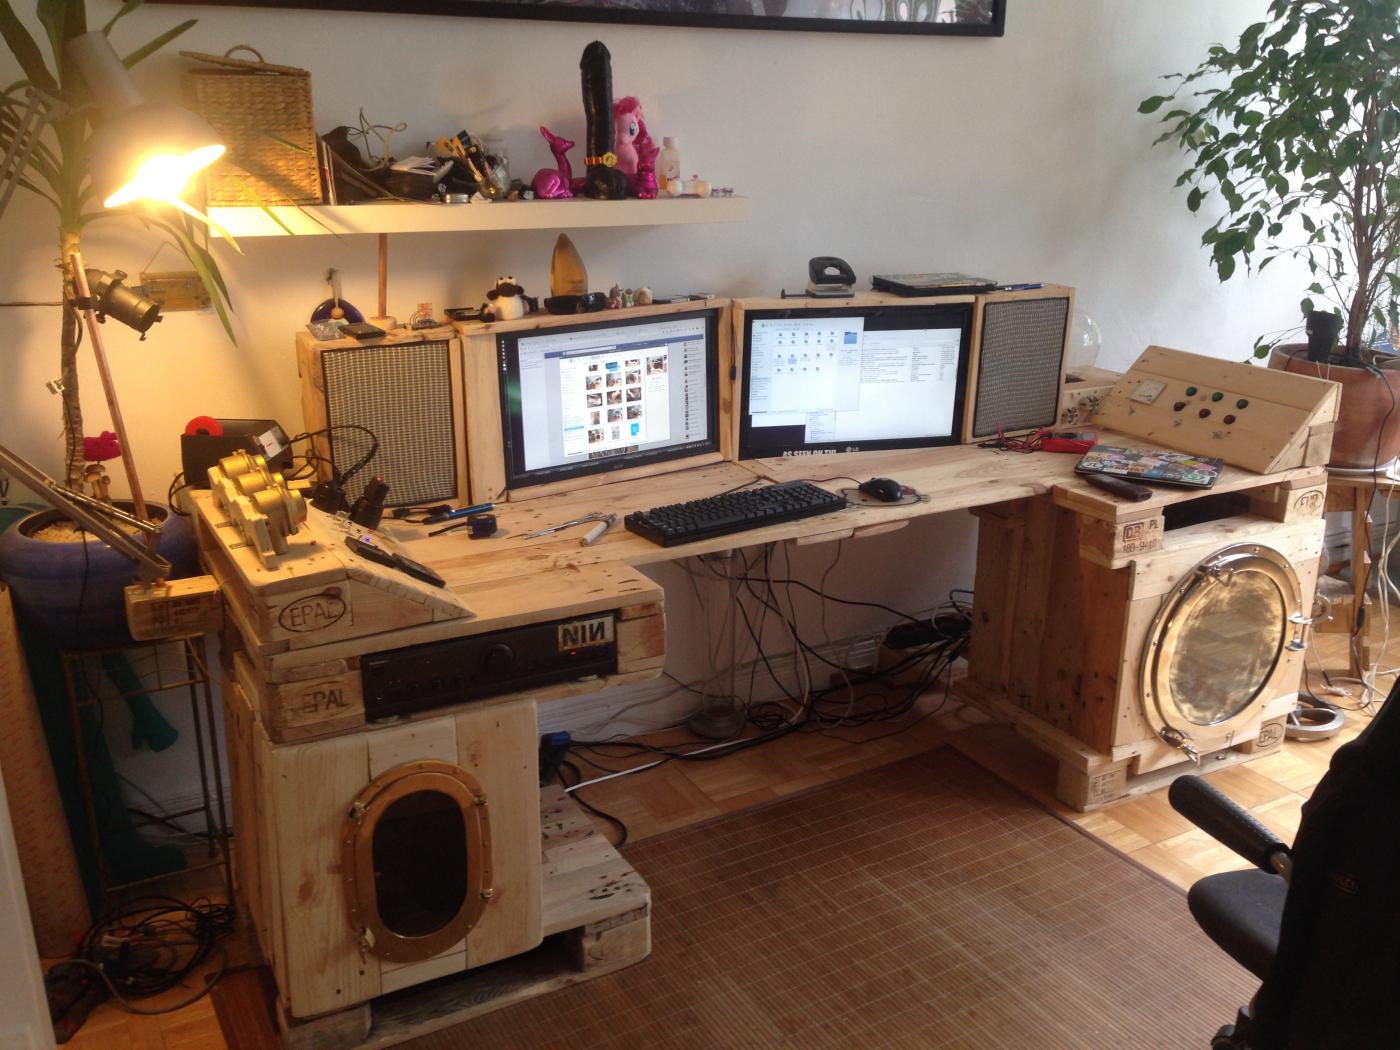
The power supply is placed to an opening to the rear out, the actual “cabinet backplane” is again partly closed with grillcloth for ventilation purposes. LEDs and other metering from the computer (Power, HD display and Mini Speaker) are just inserted/cabled to the cabinet front next to the porthole, the power button is placed into the very top dashboard, where i later used… well, a doorbell button to switch it on.
Back into the basement, sawing, sanding and fixing the remaining parts, wax varnishing and then….
…it should be completed soon, I thought…
… but: the small stuff adds up. I needed a drawer. I’ve already built some, but it is a bit cumbersome.
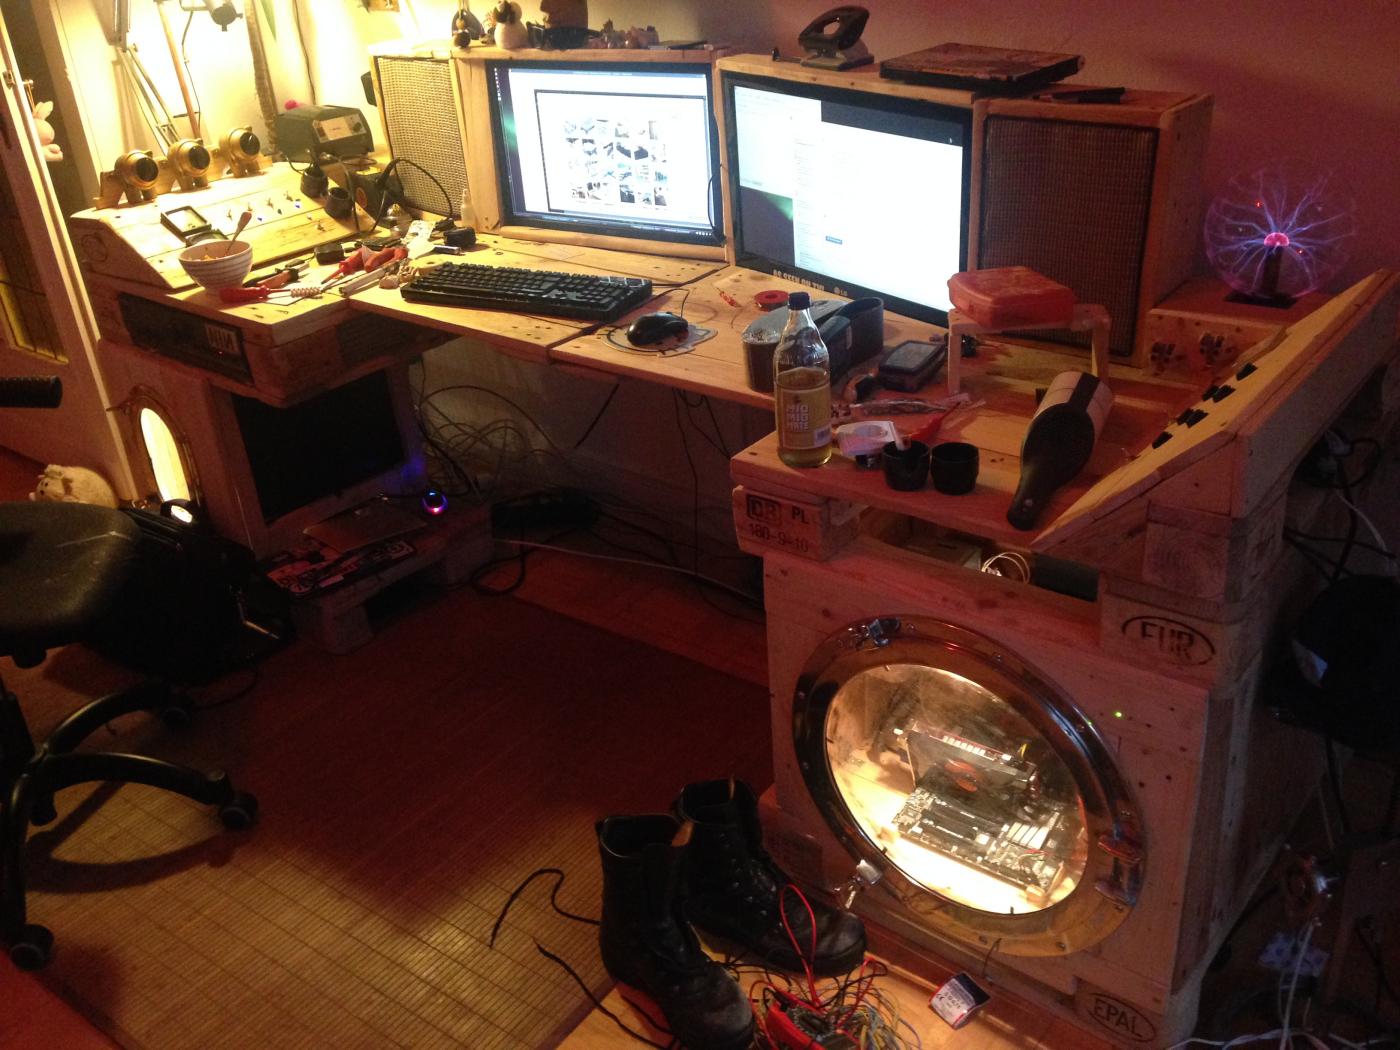
Then the computer illumination (well, they *need* illumination, and then, you also need stuff to switch on and off with all those switches). And its aesthetically impossible to build this porthole stuff without seeing afterwards what’s inside. Two halogen spotlights wired into the cabinets, switched via the lighting control desk. Then: the plasma ball. I found a Russian 50V voltmeter I had to use in any case. With 50V, i can’t measure normal power outlet voltage, so i measure the 12V power for the plasma ball. I now switch on a 230V socket outlet with its own (high voltage) status LED, which powers the supply unit for the plasma ball, which again gets measured by the russian voltmeter and illuminates the plasma ball respectively.
Then I wanted some spotlights. At the flea market, i found some mini-spots for €25 (in Stage design!), and as i saw those, i remembered some old copper water pipes behind the house which were torn out while a renovation. Idea: grind the copper pipes, mount the spots on it and put their wiring through the pipes. Thats a quick thought and some longer work.
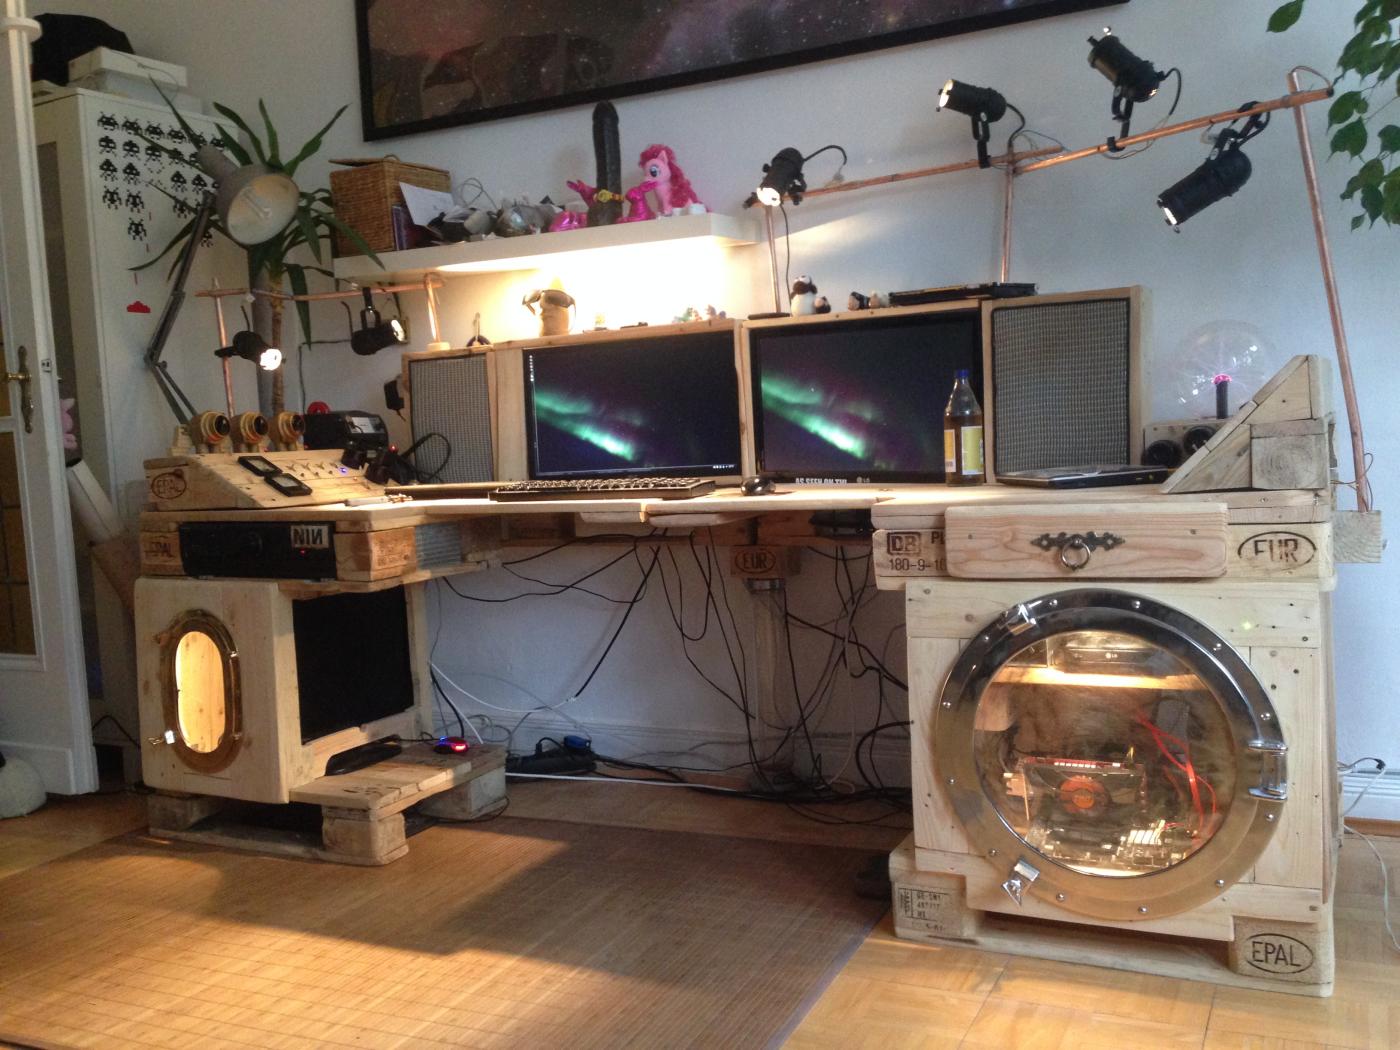

Again, this was a “It gets expensive, though the single parts aren’t that much an issue”-issue. The spots looked like a bargain. At home, the associated power supply powered up for a very last time and passed away. Six spots, 20 watts each is not powered with the cheap 12,99 supply. Again a little money for the online shop. The “light switchboard” was soldered a total of two times – the connection method that worked perfectly with the LED light switch on the dressing table did not work here. Same switches, different circuitry, i guess. Unsolder/solder stuff in a wired-up mess of switches and stuff is… well, a challenge. Under this panel, there are some soldering joints for which some day i’ll be suffering in electronics hell. Nevertheless: I believe there are few people who turn on their computer with a doorbell knob from the hardware store.

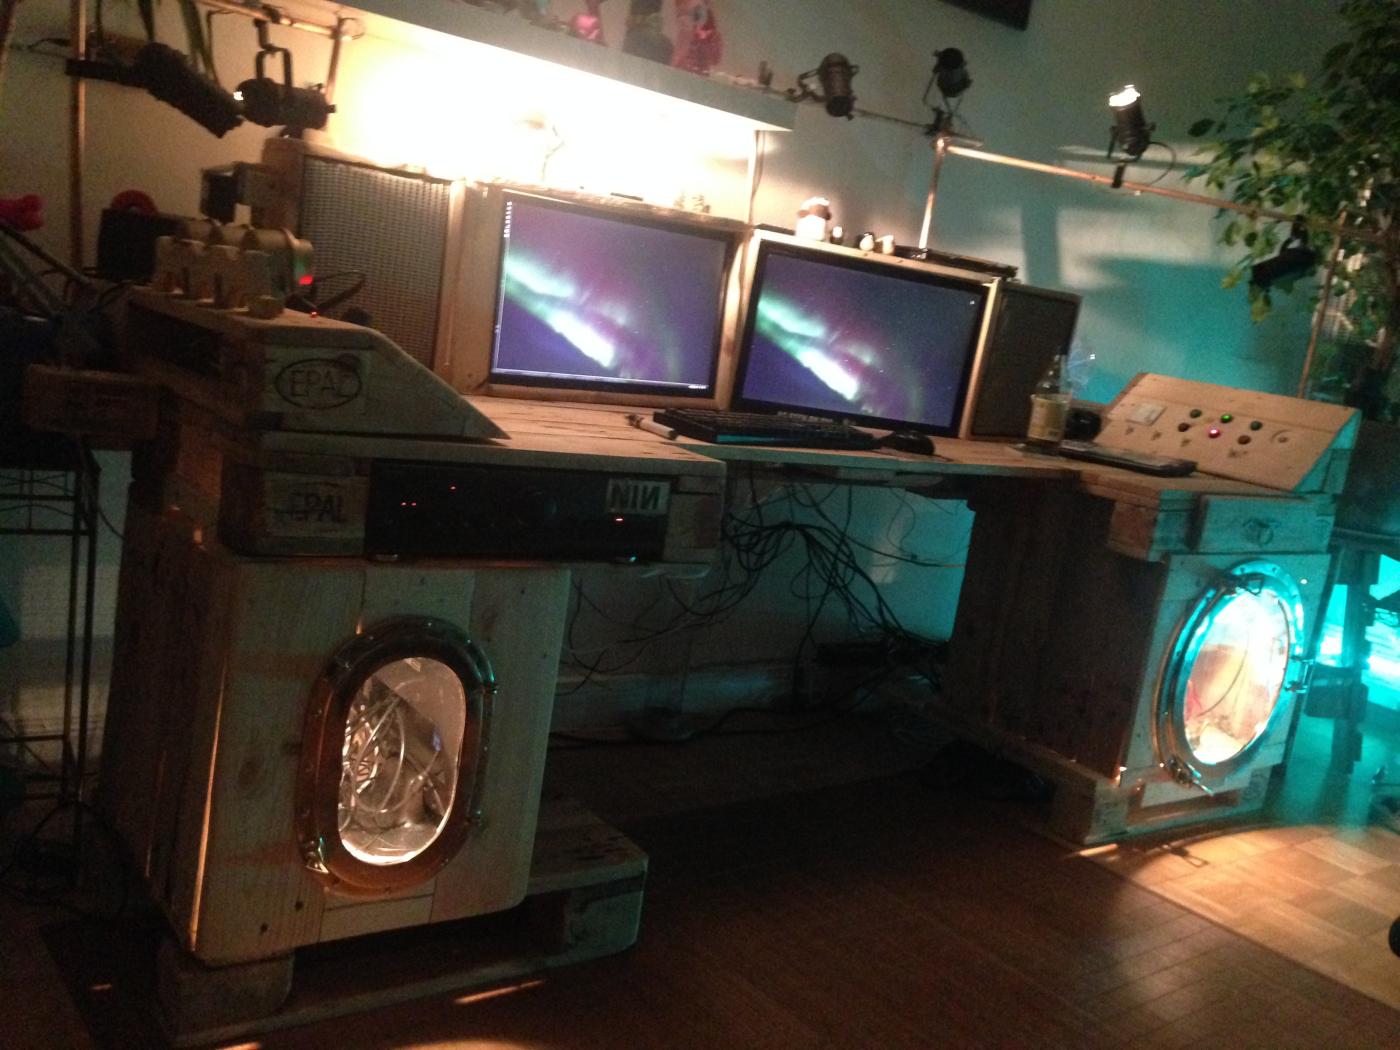
But the result is worth the hassle. Left picture: the rotary switches for stereo/amplifier and the two monitors. Upper voltmeter indicates the amplifier is on. The Russian voltmeter underneath: current for the plasma ball. The blue-lit switches indicate power for the integrated server/cupboard monitor, the desk lamp, the plasma ball (one still free for other switching issues). Red bottom right: power for the two sockets on the desk, which also can be powered on and off.
Cleaning the porthole glasses helps a lot with the look-through-effects (well, they became dusty somehow in the meantime). The little Tor server was powered on and running through the entire construction period of the second desk part, I’m a bit proud on never having to turn power or the network connection down for the whole time.
Finally: again, the warning on hidden costs. Actually, one of the advantages of creating pallet furniture are the low costs (usually). Clearly this desk is somehow special, but its in an expensive way special, too. I guess the Dollar/Euro prices are quite comparable:
Switches (many, different sorts) 120
Sockets and voltmeters: 70
Portholes, shipping, customs: 280
LEDs: 35
Lamps, new power supply: 55
Abrasive belts, wax glaze, bits, saw blades, other disposable stuff 100
Pallets: 30
Cable, wiring acessoires: 50
Sums up to over 700. Of course, some stuff can be found at cheaper prices. On the other hand, i already had a lot of stuff laying around which others don’t. Don’tr get me wrong, i’l never think that thats too expensive, too crazy, whatever, its the coolest stuff i ever built, but just the warning before you start: costs simply add up. The same applies to the amount of time you’ll need: you want a project like this one created clean, as good and precise as possible, you try/do new stuff you’re not used to yet, so everything takes longer to make. An assfull of small details i don’t remember now, whatever. The first picture of part one was taken a month ago and i was quite busy in my free time: so about four weekends and a few evenings went into that one. Not completely, but I guess eight to ten days should be closer to the truth than, well, six.
But on the other hand: Am i sorry for any Euro or minute i put into this desk? Nope. Greatest command center ever.

One thought on “Steampunk desk made of pallets, Part 2”