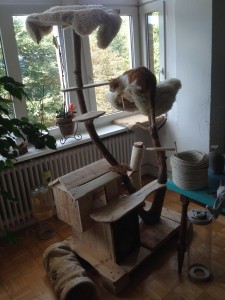
We have a new roommate, who needs some home furniture. I still have some spare wood from the bark beetle wood action lately (the dressing table), so it comes to mind to build a cat scratching post with an integrated cat villa with viewing platforms.
Once again, no “pure pallet furniture” project – one “raw pallet part” used, a half, modified Euro pallet. Confession: i also dismantled material from my first pallet bed. The half pallet is a very suitable base. Also used: remains of the desk disassembly and a half, new euro pallet. Mostly used as completely disassembled pallet boards, plus two reused pressboard shelves whics were used as side support/legs of the first desk in very early times.
Clearly, its more a recycling but a pallet project, but the typical pallet wood look is there, and I like it.
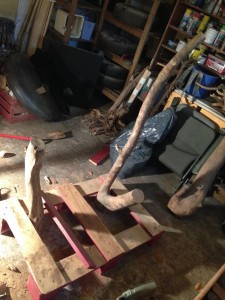
The basis. Half an Euro pallet, from which one half is covered completely with planks. Since we have to fix the poles here, these should be solid, not kinda splintered or otherwise crumbly boards.
I painted the pallet for the bed usage eaarlier, so I had to grind sharp anyway. For the first time here. no treatment/glazing at all, so give it a good sanding, also to have no dirt, splinters, painting leftovers, whatever.
The barkle beet branches are also sanded, their ends cutted straight, to have a solid fixture later on. I just used longer/thicker wood screws (about 10cm) and drilled four of them through the floorboards into the trunk. Given the solid floorboards, this seems very stable to me, but if you have heavy wood, lighter palette boards, etc., consider reinforcing with metal underneath. As I said, the longer the stem, the greater the leverage. Last not least: some cats may have some more weight and destructive energy as others to add to the needed stability considerations.
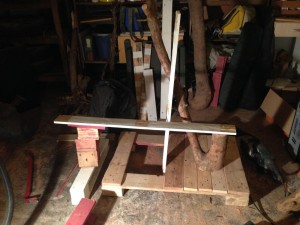
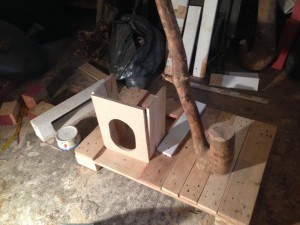
And here it ends with the “pallet elements”. All following work uses tree trunks/branches and much abraded pallet boards. The “floor” goes through the hole in the base pallet on a suitably sawn pressboard piece.
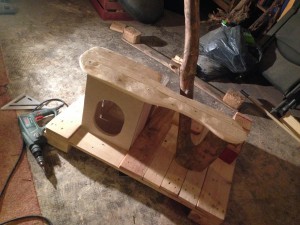
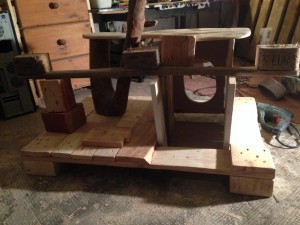
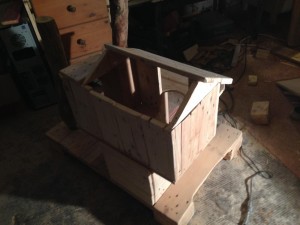
Same goes for the “entrance front”, since I was too lazy to cut several boards and do the additional grinding. In retrospect, i regret it: we had painted the front later, since it just didn’t look good with the “normal wood”.
The second floor. Skipped some work progress here, but that’s really cutting boards to size, grind, attach. The “hatch” leads through the ceiling of the basement to the first floor and also directly to the balcony. All edges need to be rounded/sanded accordingly.
Placed behind the second tree trunk: this is not one of the bark beetle wood branches, but some other branch we found in the forest. Also simply fixed with solid wood screws through the bottom floor.
Now some smaller boards, simply to be placed on the branches ends.
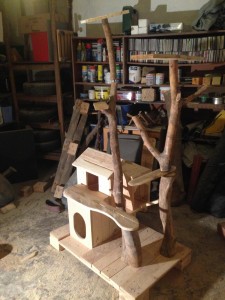
Cat cottage and scratch pole, mostly completed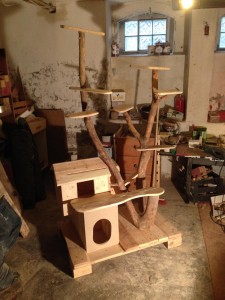
I just drilled holes with a 18mm drill into the branch tips and abused some leftover copper tube from the lighting structure of the steampunk desk as connectors. Idea behind: from now on, the whole construction is so heavy that I want nothing “fixed” anymore, but “pluggable”, to keep the whole thing transportable.
A nice side effect: if you’re finished and (like me) have ideas to change/improve the whole structure again, it’s modificated/rebuild easily. Example: the platforms turned out to be too small, specifically, at least these on top to sit/lie onand need to be wider. We will come to it.
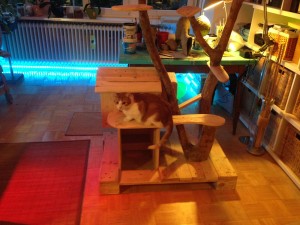
The cat is skeptical. I was, too. Everything seemed a little too high and somehow unbalanced, and what bothered me in particular were the missing large, comfortable high places to have a nap on. Nevertheless, it was quite reassuring that the landlord at least deemed the balcony as worthy for an examination.
Anyway, back to the basement, cutting a few boards more. To be exact: two. One broader and one narrow board were left over, both of pallet-typical 120cm length. One sawn to 4 × 30 (narrow) and one to 3 x 40 (wide), two boards each cutted at the edge obliquely with the jigsaw and bolted.
Upstairs again. Reminder: straight cutted, solid branch/trunk ends are crucial. The piece of branch that was attached to the posterior branch which seemed too high and shaky, transdformed to a solid improvement of the balöcony structure after having it cutted better and fixed with the 18mm copper tube connection.
In the meantime, my girlfriend painted the rather ugly, eyecatching front entrance panel, and I wrapped an about 8mm thick Sisal rope to the rear trunk and fixed it with hot glue.
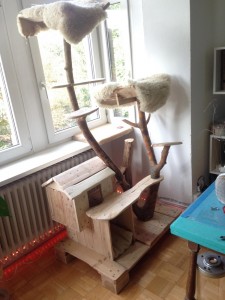
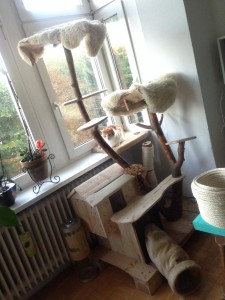
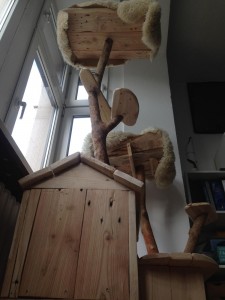
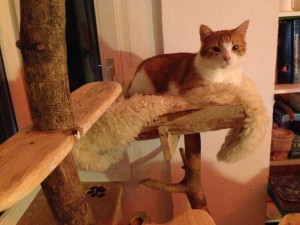
The Master took note of the latest improvements and kindly accepted his gift. Since then, he’s encountered frequently on the middle deck area. Off the record: he’s a fraidy-cat and is scared of the entrance, and once he climbed to the very top, we were proud as hell, regarding this incredibly brave cat. But while he majestically enjoys the middle observation deck, these little character flaws can be overlooked.
Time needed: A bit more then a weekend. Material requirements: about one pallet, plus branches. Everything now completely untreated and only sanded.

